

A hollow sound under a floor tile means an air gap sits between the tile back and the mortar or substrate below, and that gap starts during installation.
The short version is simple. A tile that rings hollow when tapped has an air gap between its back and the mortar or substrate below it. That gap forms when mortar coverage is incomplete, when the substrate moves, or when moisture or contamination breaks the bond. Some gaps are harmless. Others spread and lead to cracked or loose tiles.
Start by mapping the hollow spots with a tap test, then match the finding to the right fix rather than guessing. The sections below walk through causes, diagnosis, standards, and costs so you can decide whether to monitor, inject, reset, or replace.
What a Hollow Sound Actually Means
When you tap a well-bonded tile, the vibration travels straight into the mortar bed and the substrate, producing a sharp, high-pitched click. When a void sits between the tile back and the mortar, the tile is free to vibrate like a drum skin, and the same tap produces a dull, low thud. The difference is easy to hear once you compare a suspect tile with a solid one nearby.
The void itself is usually a pocket of air trapped under the tile. It can be small, near an edge or corner, or it can run across most of the tile. Large-format tiles, those larger than about 15 inches on any side, are more prone to hollow spots because they do not flex down onto mortar ridges the way small tiles do.
A hollow sound is an acoustic symptom, not a measurement. Industry standards do not test floors by listening. They test by pulling tiles and measuring how much of the back is covered by mortar. So a hollow tile can still meet coverage requirements, and a solid-sounding tile can still fail them.
Why Tiles Debond from the Subfloor
Debonding is the process by which a tile loses its grip on the mortar or the mortar loses its grip on the substrate. Once that bond breaks, the tile is held only by surrounding grout and gravity. Several forces drive debonding over time.
Expansion and contraction are the most common. Tile, mortar, and substrate all move at different rates as temperature and humidity change. Without enough movement joints, that stress concentrates at the bond line and slowly breaks it. The problem is worse outdoors, in sunny rooms, and in wet areas.
Substrate movement adds another layer. Wood subfloors flex between joists, and concrete slabs shrink and curl as they cure. If the substrate was not stiff or flat enough for the tile chosen, the mortar bond takes the strain and fails first.
Moisture can break a bond from below. Hydrostatic pressure, a damp slab, or a flood can soften thinset, dissolve adhesives, or delaminate plywood. Once water gets under a tile, the bond rarely recovers on its own.
Common Installation Mistakes That Cause Voids
Most hollow tiles trace back to how the mortar was applied. The most frequent error is using too small a trowel notch for the tile size, which leaves ridges too shallow to collapse fully when the tile is pressed into place. Skipping the back-butter step on large tiles has the same effect, because the tile back never receives a full bond coat.
Another common mistake is letting thinset skin over before the tile is set. Once the surface dries, the tile bonds only where pressure breaks through, leaving the center hollow. Working beyond the mortar’s pot life, or disturbing tiles while they cure, produces the same result.
Contamination on the substrate also blocks adhesion. Paint, lacquer, sealer, dust, or loose debris all act as bond breakers. A subfloor must be clean, sound, and free of coatings before thinset is applied.
Finally, inadequate substrate preparation plays a role. An uneven slab or an out-of-flat subfloor leaves high and low spots that the mortar cannot bridge evenly, so some areas of the tile end up unsupported.
Substrate and Environmental Causes
Not every hollow tile is an installer’s fault. The substrate itself can be the problem. Over concrete, a slab that was not cured long enough, or one with excessive deflection, can delaminate under the mortar bed. Over wood, joists that are spaced too far apart or a subfloor that is too thin allow flex that cracks the bond.
Some systems are designed to separate the tile layer from the substrate on purpose. A mortar bed installed over a cleavage membrane, as in TCNA Handbook detail F111, intentionally allows the tile bed to move independently. In those assemblies, a hollow sound is expected and does not indicate a failure. The Tile Council of North America notes that only an on-site inspection can tell the difference.
Environmental swings matter too. Tiles in sunlit rooms, near heating elements, or in wet areas expand and contract more, which stresses the bond. Missing movement joints in these locations are a leading cause of later debonding.
How to Tap-Test and Map Hollow Tiles
The tap test is the standard homeowner diagnostic. Take a wooden dowel, the plastic handle of a screwdriver, or a set of keys, and tap or drag it across the floor, including the corners and edges of each tile. A solid tile gives a crisp, high-pitched click. A debonded tile gives a dull, low, hollow thud. Mark each hollow tile with painter’s tape.
Note whether the whole tile is hollow or only a corner or edge. Then press down on each marked tile with your heel. Does it rock, click, or move? Is the grout around it cracked or crumbling? Those two observations sort tiles into repair categories.
Use this table to classify what you find.
| Finding | What it means | Typical action |
|---|---|---|
| Hollow but stable | Sounds hollow, does not move, grout intact | Candidate for epoxy injection |
| Loose and moving | Rocks or clicks, grout cracked or missing | Lift and reset the tile |
| Cracked | Any hollow tile that has already cracked | Replace the tile |
| Widespread | A quarter or more of the floor sounds hollow | Likely systemic; investigate substrate |
If only a few tiles are hollow, especially with large-format tile, that is fairly common and not always a defect on its own. If the pattern is widespread or follows a joist line or an old patch, look past the mortar to the substrate.
Hollow vs Loose vs Cracked: What Each Means
These three conditions are related but not the same. A hollow tile has a void beneath it but may still be bonded around the edges. A loose tile has lost enough bond to move underfoot, often with cracked or missing grout. A cracked tile has fractured, usually because a void let the tile flex under load.
The progression matters. A hollow spot is a weak point that is more likely to crack first under a dropped object or heavy point load. Left alone, a hollow tile can stay stable for years, or it can loosen and crack. The difference depends on traffic, substrate movement, and how large the void is.
Cracked tiles should be replaced rather than repaired, because filling a crack with epoxy seals it cosmetically but leaves the underlying void. Loose tiles need to be lifted, cleaned, and reset in fresh mortar.
Is a Hollow Tile a Defect Under Industry Standards
From a standards standpoint, a hollow sound by itself is not considered a failure or a defect. The Tile Council of North America and ANSI A108 focus on mortar coverage and support, not acoustics. Sound is not a recognized method for evaluating a tile installation.
ANSI A108.5 sets the coverage requirements that actually govern quality. Section A108.5.2.2.3 states that thorough embedding is required to obtain maximum contact of mortar on the back of each tile, with contact area not less than 80 percent, or as specified in the contract documents, whichever is greater. For all exterior installations or interior wet installations, contact area must not be less than 95 percent. The 80 or 95 percent coverage must be sufficiently distributed to give full support of the tile, with particular attention to all corners and edges.
ANSI A137.1, the American National Standard Specifications for Ceramic Tile, governs the tile itself, including size, thickness, and flatness tolerances. Irregular tile can raise installation difficulty and cost, which is one reason coverage problems show up more often with certain products.
Because standards are measured by pulling tile and inspecting coverage, the only reliable way to evaluate an installation is selective removal and direct verification. Tapping cannot prove or disprove compliance.
When Hollow Tiles Are Not a Concern
Over concrete, if there is no deflection in the floor, grout and gravity will help keep the floor in place, provided there are sufficient movement joints and minimal shear forces. A few isolated hollow spots in a dry interior room may simply be monitored.
Large-format tile installations commonly have minor voids, especially near edges, and these are not always defects. If the tile is level, the grout is intact, and nothing moves underfoot, the floor can perform well for years.
The situation is different over wood. Movement in the subfloor can cause grout to break away from the tile, compounding the instability. Hollow tiles over wood subfloors deserve closer attention and earlier repair.
Repair Options: Epoxy Injection vs Lift and Reset
Two repair paths cover most hollow tiles. Epoxy injection fills the void without removing the tile, which is valuable when you have no spare tiles. Lift and reset removes the tile, cleans it, and re-bonds it in fresh mortar. The right choice depends on stability, cracking, and access.
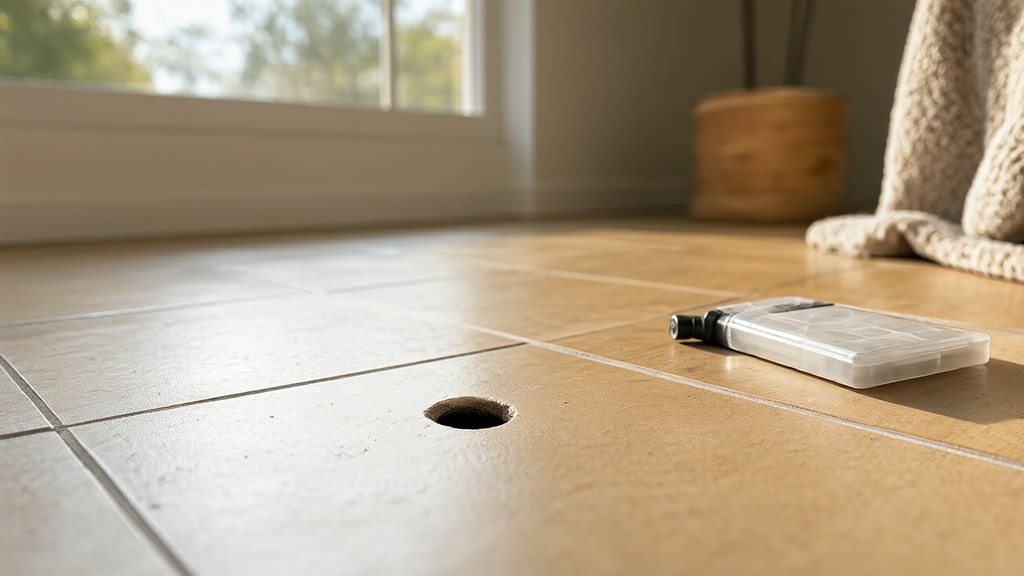
Epoxy injection works when the tile is still level with its neighbors, is not cracked, and the void is under part or all of the tile. The process involves drilling small access holes, vacuuming dust, injecting low-viscosity two-part resin until it appears at a vent hole, then weighting the tile overnight. The hollow sound should turn solid as the void fills.
Lift and reset is required when the tile rocks, the grout is cracked or missing, or the tile has already cracked. The tile is removed, the old mortar is scraped, and the tile is reset with fresh thinset. This is more invasive but addresses the root cause better than filling a void.
For a broader walkthrough of re-bonding loose tiles, see the guide on how to fix loose floor tiles. If a tile has cracked, the guide on how to repair cracked floor tiles covers replacement and grout matching.
Injection has limits. It is not practical over a large area, it does not address the underlying cause of debonding, and it is not recommended over timber or compressed fiber-cement sheets, over waterproofing, or where moisture is present. Resin rigidity and flexible substrates do not mix, and damp substrates can inhibit curing.
When to Replace the Whole Floor
Replacement becomes the better investment when damage is widespread or systemic. If a quarter or more of the floor sounds hollow, or if hollow tiles follow a substrate defect rather than isolated mortar gaps, spot repairs will not last. Loose tiles from structural issues, multiple cracked tiles, or visible water damage beneath the surface also point to replacement.
Full tear-out and re-tile also makes sense when matching tiles are no longer available, when the floor is near the end of its lifespan, or when regrouting a whole area would cost more than retiling. Removing floor tile is labor-intensive and can take 8 to 12 hours depending on room size and installation method, plus two to three days to lay new ceramic tile.
For grout-specific damage that is not tied to hollow tiles, the guide on how to repair damaged grout covers regrouting and color matching.
Cost Ranges for Hollow Tile Repair
Costs vary with the extent of damage, tile type, and whether you hire a professional. The figures below are typical ranges drawn from contractor and home-service estimates.
| Repair type | Typical cost | Notes |
|---|---|---|
| DIY epoxy injection kit | Tens of dollars | Can treat several tiles |
| DIY lift and reset | Well under 50 dollars in thinset and grout | For a handful of tiles |
| Professional repair, few tiles | A few hundred dollars plus minimum service call | Often a flat fee for a single tile swap |
| Professional hollow tile repair | 400 to 600 dollars per tile | When replacement is recommended |
| Ceramic tile repair, average job | 466 dollars, range 140 to 1150 plus | Materials and labor |
| Professional repair per square foot | 2 to 30 dollars | Higher for structural issues |
| Full replacement | 3 to 22 dollars per square foot | Materials and labor included |
| Most homeowners replacing tile | 800 to 3000 dollars total | 15 to 20 dollars per square foot |
| Subfloor stiffening or framing | Few hundred to several thousand dollars | Depends on access |
Professional repair of a single tile often runs around 150 dollars as a flat fee. Significant jobs like regrouting a whole bathroom can cost more than simply retiling the floor. DIY repairs save money but require specialized tile tools and time.
How to Prevent Hollow Tiles on the Next Install
Prevention starts with substrate preparation. The subfloor must be clean, flat, and stiff enough for the tile size chosen. Remove paint, sealer, dust, and loose debris before applying thinset.
Choose the right trowel notch for the tile size and back-butter large tiles so the mortar covers the back fully. Pull a test tile early in the run and check the back for coverage. The transfer should sit close to the minimums of 80 percent in dry areas and 95 percent in wet or exterior areas, spread evenly rather than concentrated at the edges.
Press each tile into the mortar by pushing perpendicular to the combed ridges to collapse them fully. Maintain joint alignment and spacing, and keep adequate joint depth open for grouting. Work within the mortar’s pot life and do not disturb tiles as they cure.
Place movement joints where standards require them, especially outdoors, in sunny rooms, and in wet areas. Match the thinset to the substrate and tile type, and avoid moisture-sensitive adhesives where hydrostatic moisture or flooding is possible.
For a broader overview of tile types and installation basics, the tile flooring guide covers material selection and substrate requirements.
Does a hollow sound always mean the tile is failing?
No. A hollow sound means there is a void under the tile, but the tile can stay bonded around that void for years if it is not cracked or loose. It does mark a weak point that is more likely to crack first under a dropped object or heavy point load, so it is worth tracking rather than ignoring.
How much mortar coverage is actually required?
ANSI A108.5 sets the minimum at 80 percent mortar coverage for dry interior installations and 95 percent for wet or exterior areas, verified by pulling a test tile and checking the transfer pattern on the back. Coverage below those figures is typically what produces the hollow sound in the first place.
Can epoxy injection fix a hollow tile permanently?
Sometimes, but not always. Injection can rebond a stable, uncracked tile by filling the void, and it avoids removing the tile when no spares exist. It does not address the underlying cause of debonding, and it is not recommended over flexible substrates, waterproofing, or damp slabs. The Tile Council of North America advises that any repair that does not address the cause of failure may not last long.
Should I replace one hollow tile or the whole floor?
Replace one tile when it is cracked, loose, or isolated and matching tiles are available. Consider replacing the whole floor when a quarter or more of the tiles are hollow, when the pattern points to a substrate problem, or when matching tiles cannot be found. A professional can tell the difference during an on-site inspection.