
You are unrolling a sheet of vinyl with nothing under it but the subfloor, because a loose lay floor is held by its own weight and friction alone.
The answer is four hard limits: PVC-backed sheet up to 20 m², textile-backed up to 45 m², seams cut 5 to 10 cm, and a 2 to 3 mm gap at the skirting.
Tools And Materials For A Loose Lay Install
A loose lay floor is a floating install: no adhesive, no nails, nothing fastened to the subfloor. The sheet rests on the surface and stays put through its own weight plus friction against it, and the method is the one specified in the IVC commercial loose lay guide for sheet vinyl.
The tool list is short, because nothing here is glued down:
- A sharp utility knife with a straight edge, and a fresh blade for every pass
- A tape measure, chalk line, and a 100 mm by 50 m roll of loose lay double-sided tape
- InviseWeld cold and hot welding kits, when the seams are going to be welded
- A push broom, which is how a residential loose lay install presses the sheet down onto the subfloor as it settles
- A straight edge and a moisture test kit, for the subfloor check that decides whether this method is allowed at all
For the sequence around every other flooring method, the flooring installation guide on this site collects them all, and loose lay is one of the methods it routes to, so keep that hub in mind when a room in this house fails the loose lay rules.
The Area Limits By Backing Type
Sheet vinyl with backing is specified under ASTM F1303, which sorts the material into two types by binder content, and the loose lay cap follows the type you unrolled. IVC Commercial sets the numbers for each type:
If the backing is PVC, the sheet loose lays up to 20 m². If it is textile-backed, the cap is 45 m². A PVC sheet in a room between 20 and 45 m² moves to semi-loose lay, which means double-sided tape under the field, and any sheet beyond 45 m² goes fully adhered, because the gravity-only install stops being allowed.
| Backing type | Loose lay limit | Method past the limit |
|---|---|---|
| PVC-backed sheet | Up to 20 m² | Semi-loose lay with double-sided tape from 20 to 45 m², full adhesion beyond that |
| Textile-backed sheet | Up to 45 m² | Full adhesion beyond 45 m² |
The residential version of the same rule is easier to measure: up to 25 square yards with no more than one seam, which is the IVC residential loose lay limit for sheet vinyl.
Past the cap, the floor is bonded, full stop.
How Big A Room Can Loose Lay Cover?
A 4 m by 5 m room is 20 m², which is exactly the PVC-backed limit, so one sheet lands with no seam at all. A 4 m by 6 m room is 24 m², and the same sheet covers it with one seam and a taped joint. Multiply before you order, because the cap is on area, not on room shape.
If the backing type is still undecided, the material choices are laid out in what loose lay vinyl is, and the area rule above is what turns that choice into a ceiling.
Preparing The Subfloor For A Loose Lay Floor
Nothing in a loose lay floor is bonded to the subfloor, so nothing fills a gap under the sheet. The subfloor does the work an adhesive would do elsewhere: it has to be flat, stable, and permanently dry, and that is why a hollow under a gravity-held panel shows up as a rock under your foot.
The flatness measurement method, straight edge and feeler gauge, is set out in how to check subfloor flatness. The moisture side of the check has two limits, and both of them carry a consequence.
ASTM F1869 is the calcium chloride test, and the limit for a substrate under vinyl is 3 pounds per 1,000 ft² over 24 hours. Where a slab reads above that number, it is releasing more moisture than the vinyl can take, and the mitigation happens before the sheet arrives, not after it.
ASTM F2170 measures in-situ relative humidity, and the limit there is 75% RH. If a slab reads above 75% RH, the slab is wet inside, and the fix is drying or a moisture barrier, not the floor itself.
How Do I Prove The Subfloor Is Dry Enough?
Run both tests and write the numbers down. A calcium chloride reading at or below 3 lb per 1,000 ft² per 24 hours, and an in-situ reading at or below 75% RH, is what permanently dry means on paper, and it is the only version of the phrase a loose lay install can live on.
| Subfloor check | Limit | When the limit is exceeded |
|---|---|---|
| Flatness, measured with a straight edge | No bridged hollow under the sheet | Grind or level the high and low spots before the sheet arrives |
| Moisture vapor emission, ASTM F1869 | 3 lb per 1,000 ft² per 24 hr | Mitigate the slab, then retest |
| In-situ relative humidity, ASTM F2170 | 75% RH | Dry the slab or add a barrier before install |
If any one row fails, the method is off the table for this room, and the floor goes fully adhered instead.
Acclimating The Vinyl Before Layout
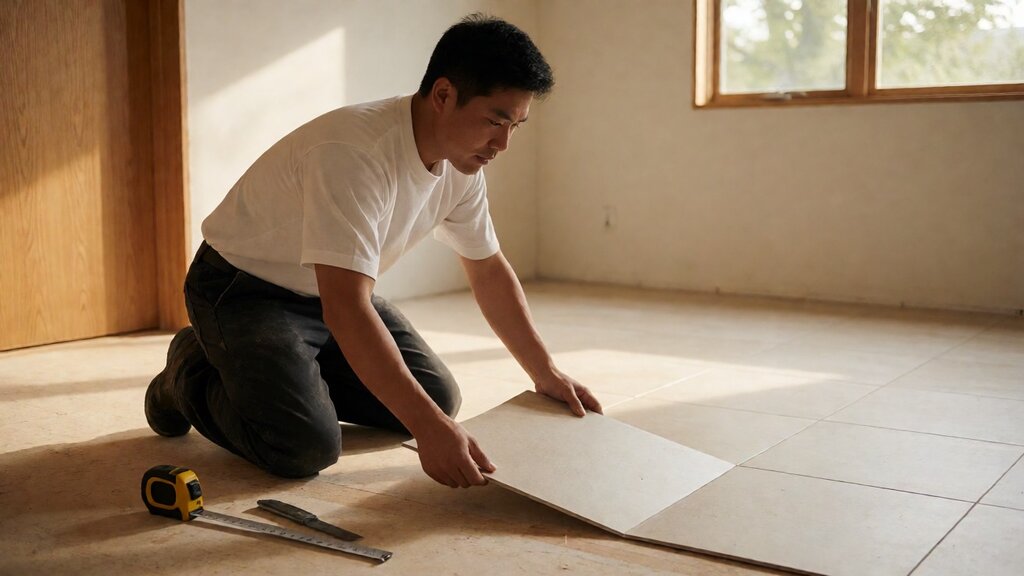
The sheet has to sit in the room before it is cut. The IVC and Mohawk installation guidelines call for 24 to 48 hours of acclimation at 15 to 30 °C and no more than 75% RH, and the Armstrong residential guide lines up: 50 to 95 °F for 48 hours before, during, and after the install.
Why it matters: a cold, tight-rolled sheet cuts ragged and sits proud of the subfloor, and one that has not settled keeps closing its own seams for days.
Polyflor’s technical manual takes it further and says to let the cut slabs sit overnight, 24 hours at 18 to 27 °C, before you cut them, and to leave a 75 mm allowance at the ends for trimming in.
How Long Does The Sheet Need To Sit In The Room?
Twenty-four hours is the floor, 48 hours is the safe number, and when the room is a cold ground floor with the heat off, use the full 48 hours and recheck the humidity, because above 75% RH the acclimation clock does not count.
Laying The Sheet And Cutting The Seams
Unroll the sheet over the layout, and leave 5 to 10 cm of excess at every cut line. The IVC method for seams is the double cut: make the first pass, reposition, and the second pass splits the overlap so the joint is butted with no compression and no overlap at all.
Trim the perimeter to a 2 to 3 mm margin where skirting boards close the gap, or a 1 mm margin wall to wall where there is no skirting. The residential guide puts the same idea in imperial: a 1/8 to 1/4 inch expansion gap, and the general rule for how wide a perimeter gap should be lives in flooring expansion gaps explained.
How Much Extra Should I Cut For The Seams?
Five to ten centimeters, every time. Cut short and the seam starves, and the double cut method needs the excess to split cleanly. Where the sheet crosses a doorway, a sliding door, a tub or shower edge, or a floor vent, an acrylic double-face tape line goes under it, and under appliances, tape in an X so the sheet cannot shift under a heavy load.
Work with a push broom as you lay: press the panel down onto the subfloor in the direction of travel so friction takes the sheet in, and stop pushing the moment the edge reaches the skirting, because the 2 to 3 mm margin is what the sheet expands into as the room warms.
Taping And Welding The Seams
Where you intend to weld a seam, the double-sided tape underneath it is mandatory, not optional. IVC’s rule is that the tape at the seam comes in with the welding, and the tape product for this is the 100 mm by 50 m loose lay roll.
Tape is not optional once welding is planned.
The welding itself comes as a hot or a cold kit. A hot welded seam can be walked on the moment it is laid, and a cold welded seam waits 24 hours before it takes weight. The general walk-on times for other methods are covered in when new flooring can be walked on.
When Can I Walk On The Seams?
For the welded joint itself: hot weld, now; cold weld, after 24 hours. For the rest of the sheet, the Polyflor manual says the floor can be walked on after a short settling period, and furniture follows the same rule, because the heavy pieces go down only after the sheet has taken its seat.
Where Loose Lay Is Not Allowed
The gravity-only method has a short list of rooms where it is not allowed at all, and the list comes from the Mohawk and IVC loose lay guidelines.
No loose lay on a safety floor, no loose lay on a ramp, no loose lay in a wet room or a wet zone, nothing over a built-in floor drain, and no loose lay under a swivel or castor chair.
Can Loose Lay Take Swivel Chairs And Roll Carts?
No, that is the first one on the list. A swivel chair puts a moving point load on a sheet that nothing holds, and where the room needs a swivel, a cart, or traffic through a wet zone, the floor goes fully adhered instead, which is the method the glue down flooring installation guide on this site covers.
Wet zones fail the subfloor rule rather than the traffic rule: a loose lay sheet over a floor drain or beside a shower base breaks the permanently dry requirement, and the fix for that room is an adhesive under the whole field.
Room Temperature After Installation
Once the sheet is down, the IVC commercial rule for room temperature is 6 to 30 °C, with an absolute min and max of 0 to 45 °C, and the install is only valid inside that window. The residential 50 to 95 °F for 48 hours from the Armstrong guide is the same rule in its own units.
If the room cannot hold the range while the floor settles, wait for it, because the seams are still finding their seat in the first days, and a room that swings outside the window is the most common reason a finished floor starts working itself up.
Loose Lay Versus Glue Down
The two methods are the same material with one variable changed: whether anything under the sheet bonds to the subfloor. Loose lay gives up permanence and buys everything else, and the comparison is short:
| Factor | Loose lay | Full adhesion |
|---|---|---|
| What holds the floor | The sheet’s own weight and friction | The adhesive bond to the subfloor |
| Area | Up to 20 m² PVC-backed, 45 m² textile-backed | No area limit, required beyond 45 m² |
| Required where | Dry, flat rooms only | Wet zones, ramps, drains, swivel chairs |
| Seams | Butted, taped, welded | Butted, taped, welded over a bonded field |
| End of life | Lift out and reuse, no adhesive residue | Cut out of the subfloor |
If the room is inside the limit and the slab passes both moisture numbers, loose lay is the faster method and the one you can take up and move. If it is not, full adhesion is not a fallback, it is the only method the room allows.
Troubleshooting A Loose Lay Floor
Why Did My Seams Open?
Three causes open almost every seam on a loose lay floor, and the fix follows the cause. A seam cut with compression instead of butted opens under foot traffic. A seam taped over dust, or taped where the mandatory double-sided tape was skipped, opens because friction alone was doing the holding.
A sheet pushed tight against the skirting with no 2 to 3 mm margin lifts as the room warms, and the lift shows up at the nearest seam.
If the subfloor is the cause, the symptom is a rock or a cup of moisture: a panel bridging a hollow rocks, and a wet patch wicks through the backing. Neither one is fixed by re-taping, so the subfloor gets retested and repaired before the sheet goes back down.
Most loose lay failures are one of three things: a wet subfloor, a missing margin, or a compressed seam.
Taking Up The Sheet
When the room changes, a loose lay floor comes up the way it went down. Lift the sheet at a corner, pull it along its own seam, and roll it face out; there is no adhesive residue on the subfloor and nothing to scrape off.
Where the sheet still lies flat, it is a floor for the next room, and it moves on the same 20 to 45 m² rules.
If a panel has curled in storage or cut ragged in the last install, it is off the reuse list, and the choice of what material goes next is the one the loose lay vinyl explainer on this site covers.
The floor was held by weight alone, and it comes up by the same weight, which is the whole method in one line.