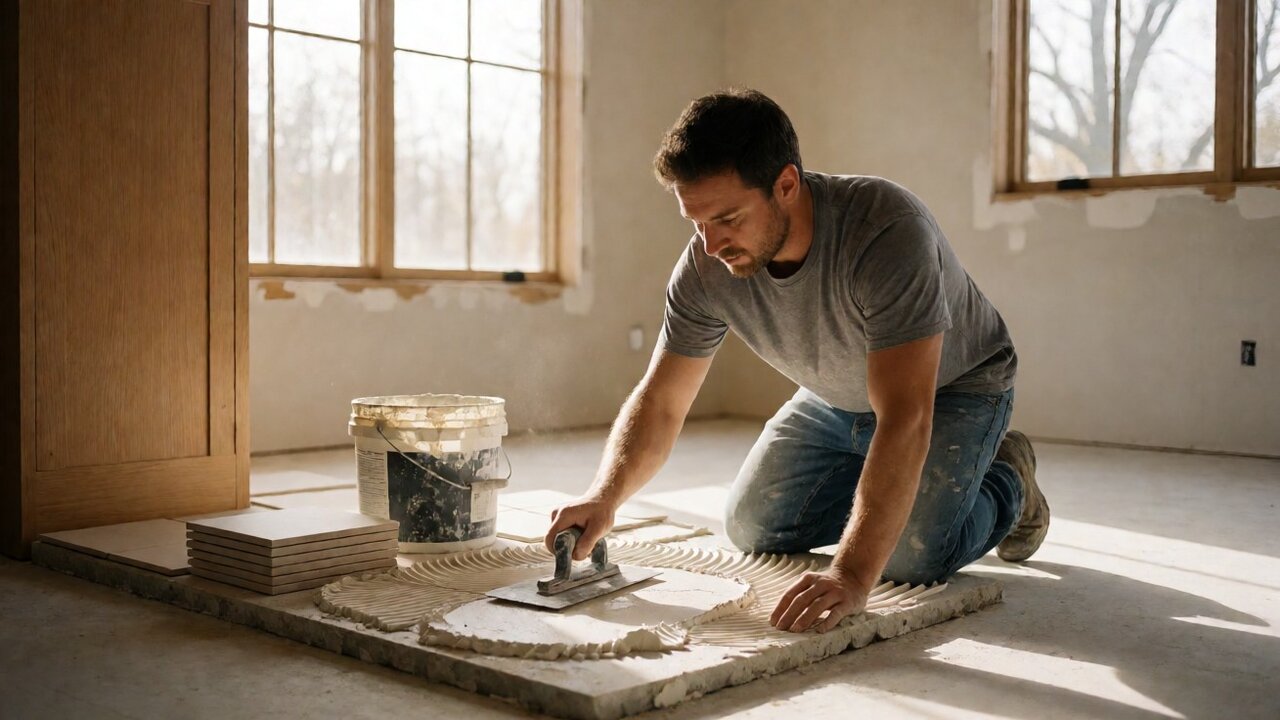

You are standing in the tile aisle holding two nearly identical bags of mortar, and the only thing that tells them apart is a word printed on the label.
For most residential floors the answer is a modified dry-set cement mortar meeting ANSI A118.4, combed with a 1/4 inch by 1/4 inch square-notch trowel, and it must reach 80 percent mortar contact under the tile.
Mortar, Thinset, And The Families In Between
Mortar, strictly, is a bed of cement, sand and water troweled thick enough to set a tile into, the wet-set method. Thinset is a bonding coat combed with a notched trowel into ridges the tile presses onto.
The ANSI A108 introduction warns that the term thin-set is not specific to any one product. It describes a family of products made as setting and or bonding coats, so a spec should cite the standard by number and title.
Thinset is not a product name. It is a family, and the bag tells you which member you have.
Is Thinset The Same As Mortar?
In practice they overlap heavily, because a modified dry-set cement mortar is a thin-set product, and most contractors call it thinset. In specification language they differ: ANSI A118.1 is dry-set, A118.4 is modified dry-set.
There is a practical reason to care. Dry-set mortar is cement and sand, and it takes up water as it cures. Modified dry-set mortar adds a polymer, so it bonds to a less absorbent back.
Epoxy is different chemistry, and the same ANSI introduction names the preferable floor setting systems: ANSI A118.1 dry-set, A118.4 latex-portland cement, A118.3 epoxy, and A118.11 EGP latex-portland cement mortars.
| Family | ANSI standard | What it is | Where it fits |
|---|---|---|---|
| Dry-set Portland cement mortar | ANSI A118.1 | Cement and sand, no polymer | Interior dry floors over slab |
| Modified dry-set cement mortar | ANSI A118.4 | Cement mortar with polymer additive | Residential floors, including porcelain |
| EGP modified dry-set mortar | ANSI A118.11 | Polymer mortar, exterior glue down | Exterior work and freeze-thaw |
| Improved modified dry-set mortar | ANSI A118.15 | Modified mortar, higher bond | Heavy tile, demanding substrates |
| Epoxy mortar and epoxy adhesive | ANSI A118.3 | Two part chemical adhesive | Showers, chemicals, kitchens |
| Modified epoxy emulsion mortar | ANSI A118.8 | Epoxy with cement or polymer base | Specialty bonding over sound slab |
| Furan mortar and grout | ANSI A118.5 | Chemical resistant furan system | Specialized chemical duty work |
What Each ANSI A118 Standard Covers
The A118 series is the material half of the tile standards, and each number governs one product type. ANSI A108.5 covers setting ceramic tile with dry-set, modified dry-set, EGP, and improved mortars.
Reading a bag label gets easier once you know the series. A mortar meeting ANSI A118.4 when mixed with water states a bond and shear adhesion value under test, and one published large-format mortar meets or exceeds ANSI A118.4.
The installation standards are the other half. ANSI A108.1A covers the wet-set method with Portland cement mortar, A108.1B covers tile on a cured mortar bed with dry-set mortar, and A108.1C is the contractor’s option.
ANSI A108.4 covers installation with organic adhesive or water cleanable epoxy adhesive, while ANSI A108.01 and A108.02 carry general requirements for substrates, preparation, workmanship, and inspection.
| ANSI standard | What it covers | Why it matters on a tile job |
|---|---|---|
| ANSI A118.6 | Standard cement grouts | The grout after the mortar job |
| ANSI A118.7 | High performance cement grouts | Stained joints and heavy traffic |
| ANSI A118.9 | Cementitious backer units | The board you bond to over plywood |
| ANSI A118.10 | Bonded waterproof membranes | Wet rooms needing a membrane |
| ANSI A118.12 | Crack isolation membranes | A slab that moves under the tile |
| ANSI A118.13 | Bonded sound reduction membranes | Footstep noise in the assembly |
Matching The Mortar To The Tile And The Substrate
Two variables decide the bag: how much water the tile drinks, and how much the substrate moves. Porcelain is defined by water absorption, and ANSI A137.1 with ASTM C373 set the line at 0.5 percent or less, per C373-18.
A nonabsorbent tile back has no paste for the mortar to grab, so the mortar must bond chemically instead of mechanically. That is why modified dry-set mortar under ANSI A118.4 is the default for porcelain. The tile flooring guide covers what each tile type is.
The substrate matters too. Plywood that flexes is not a bondable surface, which is why ANSI A118.9 backer units exist. A dimensionally unstable substrate such as hardwood flooring or oriented strand board is a poor candidate.
Mortar does not level a floor. It is a bonding layer a fraction of an inch thick, not a screed, so a low spot in the slab stays low under the tile. Measuring flatness is a separate job, and how to check subfloor flatness covers that.
Which Mortar Does My Tile Need?
Start with absorption. If the tile drinks more than 0.5 percent of its weight in water, dry-set mortar under ANSI A118.1 works on a stable slab. If it is porcelain or vitreous, specify a modified dry-set mortar.
Size comes next. Once the tile passes 15 inches on a side, move up to a nonsag large and heavy tile mortar. Then check the substrate: over a sound slab a standard mortar works, over plywood you want A118.9 board.
Choosing The Right Trowel Notch
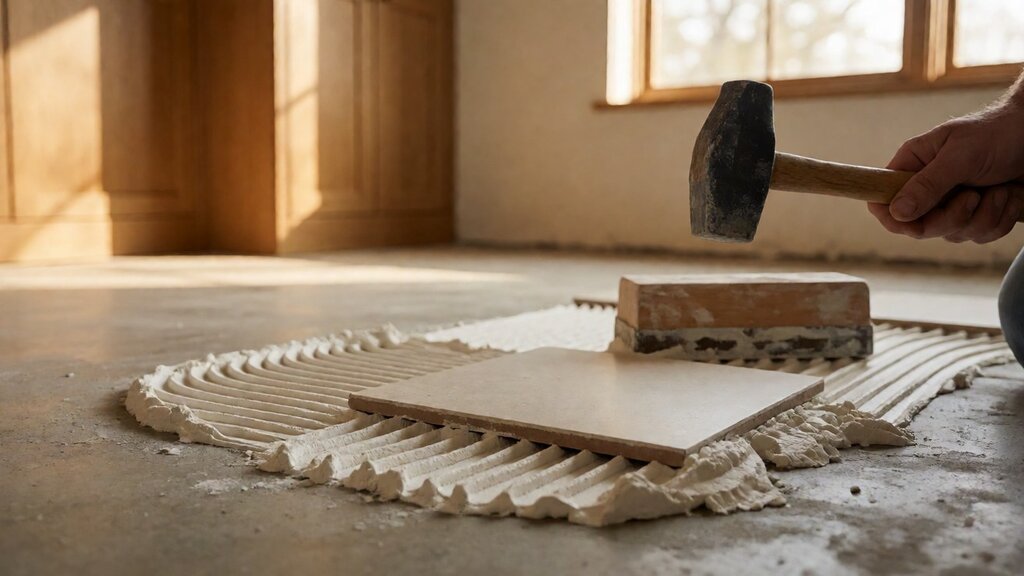
The notch decides coverage, and it is cheap to get wrong. A notched trowel combs mortar into ridges of a fixed height and spacing. The tile presses down, the ridges collapse, and the remainder supports it.
A 1/4 inch by 1/4 inch square notch is the residential default, with a ridge 1/4 inch tall and 1/4 inch wide. A 1/4 inch by 3/8 inch notch gives a taller, narrower ridge for denser tile, and a 1/2 inch by 1/2 inch notch for heavy tile.
Notch height sets mortar thickness, and thickness decides whether the 3/32 inch minimum in ANSI A108.5 is met after the ridges collapse. Not every trowel sold is notched, and a flat margin trowel spreads nothing.
Buy the size the tile demands, not whatever sits in the toolbox, and keep a separate notched trowel, since a packed notch does not comb the same bed twice.
Which Trowel Notch Do I Need?
For mosaic and small tile 4 inches or smaller, a 3/16 inch by 1/4 inch notch is enough. For standard 6 by 6 and 12 by 12 interior tile, use a 1/4 inch by 1/4 inch square notch, and for larger porcelain a 1/4 by 3/8 notch.
For large format tile over 15 inches on a side, a 1/2 inch by 1/2 inch notch is the floor. Where the tile back is deeply ribbed, the notch alone may not deliver full coverage, so ANSI A108.5 allows flat back troweling.
What Is Back Buttering, And When Do I Need It?
Back buttering means flattening a layer of mortar onto the back of the tile before it goes into the combed bed, so it carries a continuous film behind it. It is standard practice for large format tile and heavy stone.
Coverage: How Much Mortar A Bag Actually Spreads
A bag of mortar does not carry a coverage number the way a box of tile carries a piece count. A manufacturer publishes a range for one notch size, one tile size, and one setting method.
Two published sets of figures for 50 lb bags appear on manufacturer data, and they differ because they were measured for different products and tile sizes. Use the range on your bag.
A single 50 lb bag takes 6.5 to 7.5 US quarts of mixing water, and that ratio matters as much as coverage, since too much water gives weaker mortar and a longer cure.
| Notch size | Coverage, set one | Coverage, set two | Typical tile |
|---|---|---|---|
| 3/16 inch by 1/4 inch | Not published | 150 to 175 square feet | Mosaic, tile up to 4 inches |
| 1/4 inch by 1/4 inch by 1/4 inch | 85 to 95 square feet | 75 to 90 square feet | Standard interior ceramic |
| 1/4 inch by 3/8 inch by 1/4 inch | 65 to 75 square feet | 55 to 65 square feet | Porcelain, dense tile |
| 1/2 inch by 1/2 inch by 1/2 inch | 35 to 40 square feet | 38 to 45 square feet | Large tile over 15 inches |
| 3/4 inch by 9/16 inch by 3/8 inch | 40 to 50 square feet | Not published | Heaviest large format work |
| 1/2 inch by 3/4 inch by 1/2 inch | Not published | 25 to 30 square feet | Heavy tile and stone |
Here is the arithmetic. A 120 square foot kitchen floor with 12 by 12 ceramic tile takes a 1/4 inch by 1/4 inch notch. At 85 to 95 square feet per bag, 120 over 95 is 1.26 bags and 120 over 85 is 1.41, so buy 2.
Now check the rule that matters. Those 2 bags at 85 square feet cover 170 square feet of bed, and each tile is 1 square foot, so the floor needs 120 tiles fully embedded with 80 percent contact behind each.
Bag counts are a material takeoff, not a quote.
The tile flooring installation cost breakdown separates the mortar line from tile and labor, and on most residential jobs those two account for nearly all of what gets paid.
Mortar Contact: The 80 And 95 Percent Rules
This is the number that decides whether the floor passes. ANSI A108.5 requires the contact area to be no less than 80 percent in most locations. On exterior installations and interior wet installations it shall be 95.
The coverage must be distributed to give full support of the tile, with attention to all corners and edges. ANSI A108.5 carries the other half: a minimum mortar thickness of 3/32 inch (2 mm) between tile and backing.
Tile shall not be applied to skinned-over mortar. If the bed skins over before the tile goes in, rake and re-comb it, because that skin is where failure begins.
ANSI A108.5 states it as an average uniform contact area of at least 80 percent, except on exterior or shower installations where it is 95.
Natural stone gets stricter still. The Tile Council of North America handbook, 2018 edition, requires coverage sufficient to prevent cracks from voids in the setting bed, and minimum coverage in dry and wet areas is 95 percent, with no voids over 2 square inches and none within 2 inches of a corner.
How Do I Know The Coverage Is Good?
Pull up a tile, wait for the mortar to grab, then lift it and look at the back.
A pattern of collapsed ridges over most of the face, with mortar at the corners and edges rather than bare tile, means you are close. Clean parallel lines that never collapsed mean the ridge was too tall, or the tile was not pushed in.
The standard tells you how to get there. Select a notched trowel sized to facilitate proper coverage, and where necessary flat back trowel an individual tile with a bond coat. Push the tile perpendicular to the ridges.
Mixing, Pot Life And Open Time
A 50 lb bag of modified thinset takes roughly 6.5 to 7.5 quarts of water. Mix it with a paddle mixer rather than a drill and paddle bit at full speed, because the cement dust and polymer both want air out.
Read the bag twice. Once for the water ratio, once for open time.
Let the mortar slake for the time on the bag, then remix to a creamy, lump-free consistency. Pot life is how long mixed mortar stays workable in the bucket, and open time is how long the bed stays workable.
What Is Open Time And Why Does It Matter?
Published figures for a large and heavy tile mortar run about 30 to 35 minutes of open time and about 4 hours of pot life. If a tile goes down after that window, the bed has skinned and the tile rests on the skin, not the mortar.
Work in sections you can cover inside the open time rather than combing the whole room at once. When mortar stiffens in the bucket, do not add water to bring it back, because that splits the mix and weakens the bond.
After the tile is set, the mortar needs time. Published guidance is no foot traffic for 24 to 48 hours, and grouting a floor after about 24 hours. Walking on a floor that has not finished curing is how good mortar jobs get blamed.
Porcelain, Large Format And The Tougher Jobs
Porcelain is the hardest common tile to bond, because it is nonabsorbent. With that 0.5 percent absorption ceiling, tested to ASTM C373-18, the mortar does all the bonding on its own.
Large tile adds a second problem, which is weight. A 24 by 24 porcelain tile is heavy enough that setting it overhead is a problem for one person. Nonsag large and heavy tile mortars exist for this, and one bonds a coat from 3/32 to 1/2 inch.
The 15 inch line is the practical threshold. Once a tile passes 15 inches on a side, a different notch and mortar are required, and the rest of that story, including lippage and edge trim, is in the large format tile flooring guide.
These assemblies earn their own test as well. The Robinson Floor Test, ASTM C627, is the most widely referenced test for determining whether an installed tile system meets its service requirements.
Where Mortar Is The Wrong Choice
There are jobs where thinset is the wrong answer, and choosing it anyway is a common way floors fail. Published limitations for a nonsag large and heavy tile mortar rule out moisture-sensitive stone such as green marble, some limestone and granite, and agglomerate.
The same limitations rule out resin-backed tiles, dimensionally unstable substrates such as hardwood flooring, oriented strand board, asbestos-containing substrates, and metal. Glass tile is another no, because colored mortar reads through.
For light-colored and translucent natural stone, a white mortar is recommended. Room conditions decide as much as the tile does, and where the floor needs a waterproof membrane under the tile, that is A118.10 work.
Mortar bonds tile to whatever is under it, and that layer has to be right first. If the slab moves enough to crack the tile, an A118.12 crack isolation membrane goes down before any mortar goes on.
How To Check The Job Before The Grout Goes On
The inspection window is short, and it closes the moment grout goes down and hides everything. Before that, pull up a few tiles and look. ANSI A108.5 calls for no fewer than three tiles to be removed and inspected.
You want collapsed ridges and mortar contact across the face of the lifted tile, with corners and edges bearing mortar, and no skin on the bed. You also want roughly 3/32 inch of mortar between tile and backing.
Then check the floor surface, not only the tile edges. A straightedge shows a lippage problem long before anyone else does, and ANSI A108.02 sets allowable lippage for pressed floor and porcelain tile at 1/32 inch plus the tile’s own.
Where a 33 percent offset or less is the rule for patterns on tile over 15 inches, hold the layout to that before the first tile goes down. Finally, protect the cure: grout a floor after about 24 hours on a typical modified thinset job, and keep foot traffic off for 24 to 48 hours.
If the job needs a documented service rating, ASTM C627 is the test that carries it, and it pays to have the assembly details written down in advance.