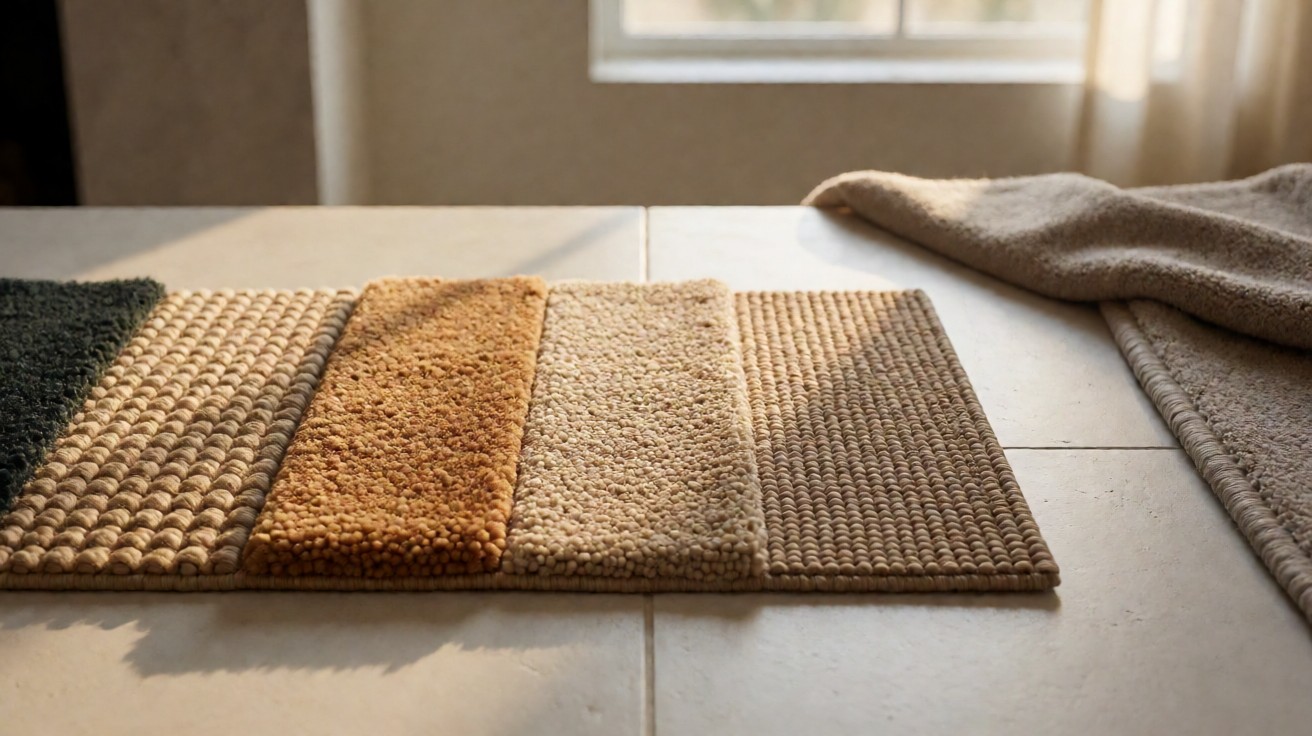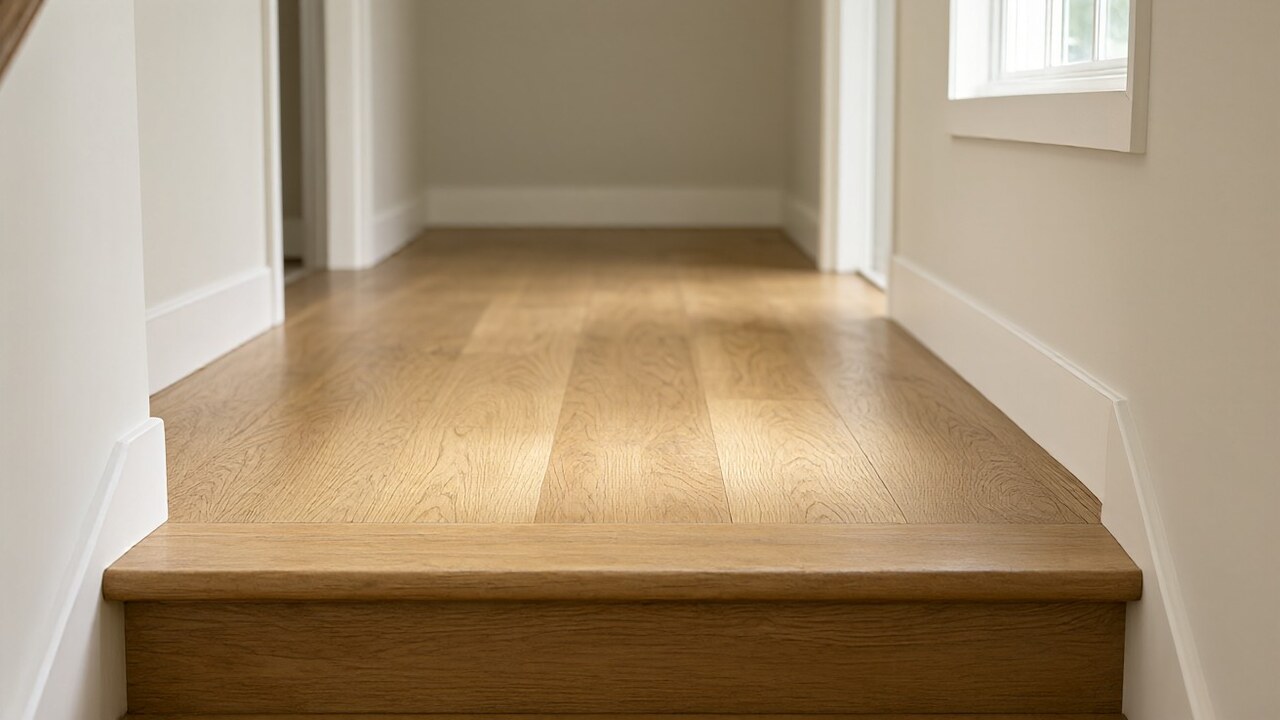

The landing is finished and the stair opening sits right beside it, so the last stretch of floor has to close off cleanly without trapping anything.
Cap the cut edge with a bullnose or an overlap stair nose fastened to the subfloor, hold a 1/4 inch expansion gap at the opening, and never nail a floating floor down at that joint. The right answer is the trim, not the floor.
Where the Floor Ends at the Staircase
Every staircase in a finished house creates two places where the floor has to stop. One is the top of the flight, where the last piece of landing floor ties into the first tread. The other is the open edge of the stairwell, where the floor simply ends and the stringer begins.
Both ends need a finished edge, and both need the edge to stay free enough to move with the season. The detail work is small, but it decides whether the expansion gap at the opening survives the year.
The side of a staircase carries a stringer, the angled member that holds the treads and risers in place. Where your floor runs past that stringer, it meets a slanted surface with no wall behind it. That is the spot most often left as a raw cut edge, because the trim that solves a wall junction does not solve a stair junction.
A floor that ignores these two ends shows it in the humps. Getting the junctions right is what keeps the surface flat from the top of the flight down to the open edge.
What the Top of the Flight Looks Like
At the top of the flight, the floor on the landing meets the first tread. If both surfaces carry the same material, the stair nosing at that joint is part of the flight, and the floor edge butts up against it.
The nosing is the leading edge of the tread that projects over the riser below. It is the piece your floor edge actually touches, and the code numbers for it are the numbers that govern your edge.
If the landing carries a different surface from the flight, the junction becomes a material change. A threshold strip or a bullnose sits between the two surfaces and carries the change. The general rules for those joints live in our guide to transitions and thresholds.
At a stair the extra rule is simple: nothing may pin the floor to the opening. Everything else about the junction follows the way the material itself wants to move.
Measuring the junction starts with the nosing projection, the distance the nosing sticks out past the riser face. Your floor edge sits directly behind that projection, and the shape of the projection sets the shape of the gap you are closing.
Why the Floor and the Nosing Must Not Pin Each Other
A floating floor rests on an underlayment and is not attached to the subfloor anywhere. That freedom is what keeps the boards from buckling as humidity changes. Per NWFA installation guidelines, a floating floor must not be fastened to the substrate at any point.
Areas that cannot take baseboard, such as a staircase stringer or an abutting stair, have to be detailed so the floor can still expand. Per NWFA, the two approved ways are undercutting the adjacent element or using an overlapping transition.
If you nail a floating floor down at the stair opening, you have created a pin. The floor can move everywhere except at that one line, and when the season pushes it to expand, the only place left to buckle is up over the joint.
That is the hump that shows up in January. It is also the reason the trim at the opening is glued to the subfloor and never to the floor.
The same logic runs the other way. If a solid wood floor is nailed to the subfloor and the nosing is also screwed through that floor, the two materials cannot move at different rates. One of them lifts, and it lifts at the joint.
The junction works when each piece is fastened to its own structure and nothing crosses the joint.
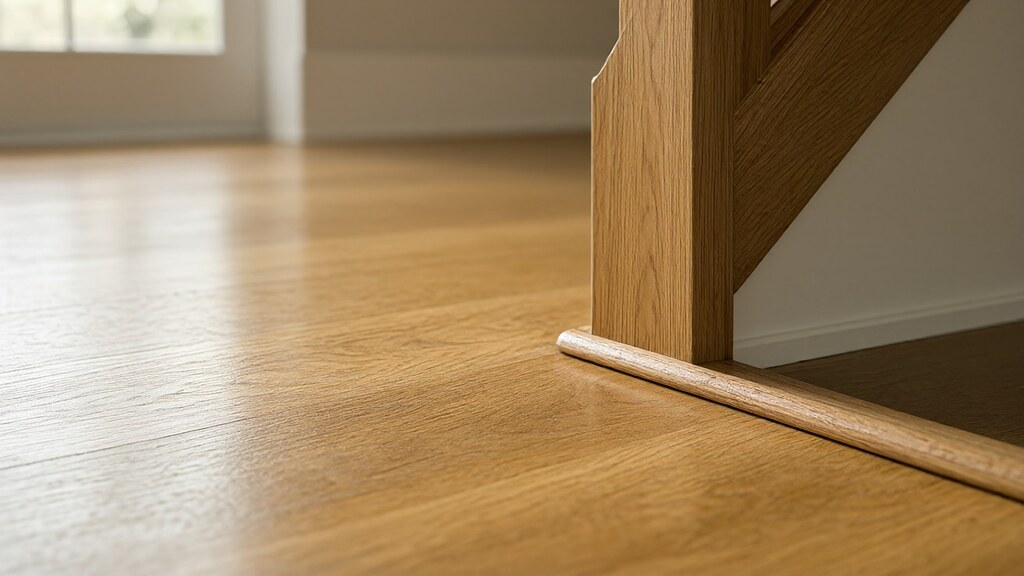
Bullnose Trim at a Stairwell Opening
A bullnose is the trim profile that caps an exposed floor edge, usually a rounded or squared piece that sits over the cut line and hides it. At a wall, the same job is done by baseboard and quarter round, which hide the gap behind a face you can lean against.
At a stairwell opening there is no wall. The cut edge is visible from the flight, and the bullnose is the piece that closes it. A stairwell opening is the one place in the house where a raw floor edge shows from the stair itself.
Edge trim at an opening gets fastened to the subfloor or to the structure, never through the floor covering. The piece covers the expansion gap, and because the floor under it still has to move, the fasteners stop at the trim line.
| Trim piece | What it caps | Fastened to | Use when |
|---|---|---|---|
| Bullnose | Open cut edge at a stairwell opening | Subfloor or structure | The floor edge is exposed to the stairwell |
| Overlap stair nose | Expansion gap at the top of a floating floor | Subfloor, lip over the floor | The floor is a floating type |
| Threshold strip | Material change between two surfaces | Both subfloors at the seam | The landing and the flight are different materials |
| Quarter round | Gap between floor and wall | Wall | The edge meets a wall, not an opening |
Choosing among those pieces comes down to one question: what sits on the other side of the gap? If the answer is air, because the stairwell is open below you, the bullnose or the overlap nose does the work.
If the answer is another floor material, a threshold takes over. The trim is chosen by what it is covering, not by which profile looks better on the stair.
The Overlap Stair Nose for Floating Floors
The overlap stair nose is a trim piece shaped with a lip that sits over the edge of a floating floor at the top of the staircase. The lip covers the expansion gap without touching the floor, and the floor keeps its freedom while the edge still gets finished.
The nose itself is glued down to the subfloor with construction adhesive.
Per Pergo installation instructions, the nose goes down with adhesive, then two 8 penny face nails about 3 inches from each end and one in the center.
On longer runs, add two 8 penny finish nails every 20 inches. The same instructions call for screws at intervals no greater than 8 inches, the first one 2 inches from each end, and a 1/4 inch expansion space held between the nosing and the floor.
Those fastener schedules come from the manufacturer whose trim you bought. Treat them as the schedule for that product, not as a universal rule, and check the box the trim came in before you buy the nails.
Worked example. A floating floor reaches the top of the flight with a 1/4 inch expansion gap at the nosing. An overlap nose with a 3/4 inch deep lip covers that gap with 1/2 inch to spare.
On a 48 inch run you place two face nails 3 inches from each end, one face nail at the center, and four finish nails spaced along the run, which comes to 7 fasteners in all.
None of those fasteners passes through the floor, and the lip does the covering instead.
When the gap you are closing is wider than 1/4 inch, specify an overlap nose whose lip is at least 3/4 inch deep. A narrow lip over a wide gap looks loose and lets air and sawdust through the stairwell.
Nailing the Floor Against the Stringer
The stringer is the angled side member of the stair. The side of your floor meets it along a line that is not quite flat and not quite vertical, and that line runs the whole length of the flight.
A solid wood floor or a glue down floor can be fastened to the subfloor right up to that line. Those floors are meant to be pinned down, and the pinning happens in the subfloor, not at the joint.
A floating floor cannot be pinned anywhere on that line. If the floor is a floating type, the gap at the stringer gets an overlapping transition instead of fasteners, per the NWFA guidance on areas that cannot receive baseboard.
Scribing is the fit technique for the angled line. You hold the trim or the plank against the stringer and trace the exact shape, then cut to the line so the piece meets the stringer all the way along the run. When the stringer is out of plumb, a straight cut leaves a wedge of daylight at one end, and scribing is what closes it.
| Piece | What it is fixed to | What it must not pass through | Why |
|---|---|---|---|
| Bullnose or threshold | Subfloor or structure | The floor covering | The floor edge still has to move |
| Overlap stair nose | Subfloor, glued and nailed | The floor covering | The lip covers the gap without contact |
| Quarter round at a stringer | The stringer face or subfloor | A floating floor | A pin at the joint becomes a buckle line |
| Solid wood flooring at the joint | Subfloor away from the joint | The nosing | Two materials pinned together lift apart |
As long as every fastener stops at the trim line, the joint stays free. The moment a screw or nail crosses from the trim into the floor, that line becomes the place the floor cannot move, and the season will find it.
Keeping the Expansion Gap Free at the Opening
The 1/4 inch space between the floor edge and the nosing is not an empty spot waiting for caulk. It is a working part of the floor, sized so the covering can take up seasonal movement without having anywhere else to go.
Per NWFA, abutting elements like staircase stringers have to allow for that expansion. The allowance comes from either undercutting the adjacent material or overlapping it with a transition piece. The gap itself has to stay open.
Can I just caulk the gap at the stair opening?
No, not on a floating floor. A bead of caulk seals the joint, and a sealed joint is a pinned joint. The floor loses exactly the freedom the gap was there to give it, and the same buckle line appears where the seal got tight.
Caulk belongs in the corner between the trim and the wall above the nosing, where nothing moves. At the floor line, the overlap nose or the scribe leaves the gap open and covered instead.
When the gap at the opening measures wider than 1/4 inch, the trim lip has to be wide enough to cover it, and the extra width gets cut into the last row rather than into the gap. Keep the full 1/4 inch, and let the nosing lip do the covering.
Nosing Dimensions That Actually Matter
The International Residential Code, in R311.7.5.3, sets the numbers a residential stair nosing has to meet. Read them with the floor junction in front of you, because the floor is what changes the picture.
A nosing not less than 3/4 inch and not more than 1-1/4 inch is required on stairways with solid risers. That is the projection your floor edge sits behind, and it is the range the trim detail has to respect.
The radius of curvature at the nosing shall not exceed 9/16 inch.
The greatest nosing projection may not exceed the smallest one by more than 3/8 inch between two stories, counting the nosing at the level of floors and landings. Beveling of the nosing shall not exceed 1/2 inch, and where the tread depth runs at least 11 inches, a nosing is not required at all.
Those numbers matter to the floor junction because the nosing projection is measured against the floor. Lay a thick vinyl or a wide plank hardwood at the top of the flight and the projection you actually have shifts with the material.
A nosing that was compliant before the floor change can sit out of tolerance after it. That is exactly why the detail at the top of the stair gets checked when the flooring work is done, not just when the stair is built.
The related dimensions set the context. Per IRC R311.7.5.1 the riser height tops out at 7-3/4 inches, and per R311.7.5.2 the tread depth starts at 10 inches, with no more than 3/8 inch of variation between the largest and smallest riser or tread in a flight.
| Dimension | IRC R311.7.5 (residential) | 2010 ADA Standards (public, accessible) |
|---|---|---|
| Nosing projection, minimum | 3/4 inch on solid risers | No minimum required |
| Nosing projection, maximum | 1-1/4 inch | 1-1/2 inch |
| Radius of curvature at the nosing | 9/16 inch maximum | 1/2 inch maximum |
| Projection variation within a flight | 3/8 inch maximum between two stories | Uniform risers and treads required |
| Riser height | 7-3/4 inches maximum | 4 to 7 inches, uniform |
| Tread depth | 10 inches minimum | 11 inches minimum, uniform |
Do I need code-compliant nosings in a private home?
The IRC governs what a builder has to deliver on a permitted stair, not a homeowner who is retrimming an existing flight. What the code numbers do for you is explain why the junction detail exists in the first place.
A floor laid at the top of the stair changes the effective nosing projection, so the builder checks it. If you are replacing the floor material at an existing stair, check the projection against the table above, and if the new material pushes it out of tolerance, the fix is a trim detail, not a wider nose.
Accessibility Dimensions at the Top Landing
The 2010 ADA Standards set the accessible version of the same junction. Per Section 504.2, all steps on a flight have uniform riser heights and uniform tread depths, with risers between 4 and 7 inches and treads at least 11 inches deep.
Per Section 504.5, the radius of curvature at the leading edge of a tread is 1/2 inch maximum. A nosing may project 1-1/2 inches maximum over the tread below it, and a sloped riser under the tread may lean at 30 degrees maximum from vertical.
Two more numbers shape the landing itself. Per Section 403.5.1, the clear width of a walking surface is 36 inches minimum, and per Section 307.5, protruding objects must not reduce that clear width. A bullnose or trim piece that projects into the landing has to stay inside the envelope those sections define.
Those standards govern public accommodations and state and local government facilities, not the private house where you are doing this flooring work yourself, and they are not the rule that binds you at home.
The honest way to use them at home is as the reference that most builders and inspectors work to when the stair serves more than one person in the house.
A top landing that holds 36 inches of clear width and a predictable nosing shape is the junction that serves everyone, including the wheelchair that shows up for a visit. As long as you keep the clear width and keep the nosing shape uniform, the detail at the top of the flight works for the whole household.
When the Floor Material Changes at the Stairs
The most common real-world version of this junction is a mix of materials. The landing is finished in one surface, the flight carries another, and the change happens at the top of the flight or at the threshold between the room and the landing.
What if the landing material differs from the flight?
If the landing is a floating vinyl and the flight is a solid wood stair, the material change is carried by a threshold strip or a bullnose. The piece bridges the two surfaces and the height difference between them, and it is fastened at the seam, not into either floor.
Choosing the material for the flight itself is a separate decision, covered by our stair material guide. How the treads and risers get built is covered the same way, in installing flooring on stairs.
Your job at the floor edge is to let that other work happen without pinning your floor to it, so the floor still moves with the season.
When the two materials are the same thickness and line up flush, a simple bullnose over the seam is enough. When the height differs, the trim has to step it, and the step becomes part of the nosing shape at the top of the flight.
Cutting and Prepping the Last Row
The last row of floor at the stair opening is usually the row that gets ripped to fit. Measure the gap the row has to close, leave the 1/4 inch expansion space at the nosing, and cut the rip with that space still open.
If the row runs past the stringer, scribe it to the angled face so it seats flat against the face instead of rocking along the run.
Before the trim goes down, the opening line has to be clean and square. A bullnose that covers a crooked cut line shows the crookedness through the rounded profile. A square cut with a 1/4 inch gap and the lip of the nose over it reads as a finished edge, which is the whole point of the detail.
The rip, the scribe, and the trim all follow the same move the general expansion gap rules describe: keep the space, cover the space, fasten the cover to the structure. The full logic of the gap is in our expansion gaps guide, and the stair opening is where that logic has to hold with no wall to hide behind.
A Quick Checklist Before You Call It Finished
Six points, checked top to bottom, decide whether the junction will hold through the seasons.
- The 1/4 inch expansion gap is still open at the nosing and at the stringer line.
- The bullnose or overlap nose is fastened to the subfloor, with no fastener passing through the floor.
- The nosing projection sits inside the 3/4 to 1-1/4 inch residential range, or the exception for an 11 inch tread applies.
- The top landing holds 36 inches of clear width with no protruding object.
- The last row is scribed to the stringer and seats flat along the whole run.
- The junction is covered by trim or an overlap nose, not by caulk at the floor line.
Run that list top to bottom, and the floor at the stair is finished the way that keeps it flat through the seasons and through the years.