
LVP and laminate cannot wrap a stair edge. A stair nosing must match tread thickness, riser height, and nosing projection. A reducer never substitutes.
Stair transitions differ from doorway transitions in three ways: the tread must resist concentrated foot impact, the nosing must be visible and slip-resistant, and the riser height must stay within code limits of 7 to 7.75 inches.
Why a stair is not a doorway
A doorway transition bridges two floors. A stair transition protects an exposed edge that takes the full force of a foot on every step. The leading edge of a tread wears faster than any flat floor, and a fall on stairs carries far more consequence than a trip in a hallway. The profile, fastening, and geometry all reflect that.
Budget 15 to 20 percent more time for stairs than for flat-floor transitions. Allow a full weekend for a standard straight staircase. Complex or curved stairs take longer and may need a specialist.
The tread, riser, nosing, and landing form a system. Change one element and the others must be checked. A flooring choice that works on the flat floor may fail on the stair if the nosing cannot be matched to it. If the nosing cannot be matched, choose a different flooring or a different nosing material.
Flush versus overlap stair nose
A flush stair nose sits level with the flooring surface. The flooring butts against it, and the top of the nose is flat with the tread. This gives a clean look and suits solid hardwood and engineered wood treads that are thick enough to accept the nose.
An overlap stair nose sits on top of the flooring. The flooring runs under it, and the nose laps over the edge. This suits thinner floating floors such as LVP and laminate, where the flooring itself cannot form the nosing.
The choice depends on flooring thickness and installation method. A 5 mm LVP plank cannot form a nosing; it needs an overlap nose. A 3/4 inch solid hardwood tread can carry a flush nose. Mixing the two on the same staircase looks inconsistent and creates uneven step heights. Standardise on one nosing type per flight for both safety and appearance.
| Nosing type | Suits | Key constraint |
|---|---|---|
| Flush stair nose | Solid or engineered hardwood treads | Flooring thickness 12 mm or more |
| Overlap stair nose | LVP and laminate floating floors | Covers 15 to 25 mm of flooring surface |
| Angle nose | Landings and top steps | Meets a vertical riser cleanly |
Stair nosing profiles and materials
Common nosing materials include solid hardwood, aluminum, and PVC. Hardwood noses match hardwood floors and can be sanded and refinished. Aluminum noses suit commercial and high-traffic stairs and accept LVP or laminate inserts. PVC noses suit budget installs and match vinyl stair systems.
Profile shapes include square edge, bullnose, and angle nose. Square edges suit modern interiors. Bullnose rounds the edge for comfort. Angle noses suit landings and top steps where the flooring meets a vertical riser. Bullnose profiles are the most forgiving for bare feet and are common in residential stairs.
Hardwood flooring to stair nosing
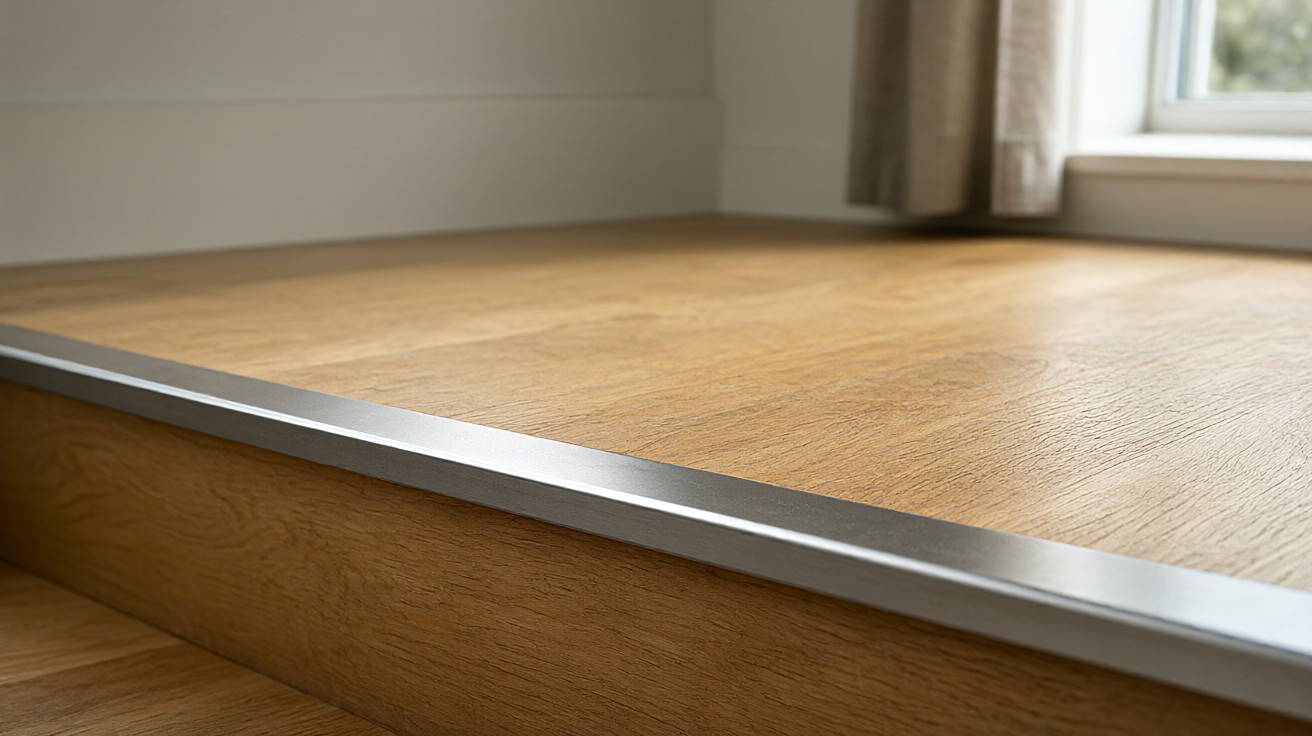
Solid and engineered hardwood treads accept a flush nosing that is glued and nailed. The nosing must be the same species and finish as the flooring, or the stair will read as two different woods. Expansion is not a concern on a nailed tread, but the nosing must be fastened securely because it takes direct impact.
For hardwood floors meeting a stair, the nosing should be installed before the flooring so the flooring can butt tightly against it. Gaps between flooring and nosing collect debris and weaken the edge. A 1 mm gap is the maximum acceptable; anything larger needs re-cutting.
LVP and laminate stair transitions
LVP and laminate stairs use an overlap nose that clips or glues over the flooring. The flooring must extend to the edge of the tread and be cut cleanly, because the nose covers only 15 to 25 mm of the flooring surface. A ragged cut shows at the edge and traps dirt.
Use a fine-tooth blade and cut with the finished side up to prevent chipping.
Manufacturer-specific stair systems are strongly preferred. Mixing a generic nose with a different flooring brand often produces a height mismatch of 1 to 3 mm, which creates a trip edge. Follow the flooring manufacturer’s stair installation guide exactly.
Dry-fit every tread and nosing before adhesive, because stair dimensions vary by 3 to 6 mm across a flight and a single cut template rarely fits all steps. Label each tread and nosing with its step number to avoid mix-ups during installation.
Landing transitions
A landing is a platform between flights of stairs. The flooring on the landing meets the stair nosing at the top and bottom steps. The nosing at the top step protects the landing edge, and the nosing at the bottom step protects the first tread. Both must match in profile and material for visual consistency.
A landing with a different nosing than the stairs breaks the visual line and confuses foot placement.
Landings also serve as rest points and must be level and slip-resistant. A landing that is too small or has an uneven surface increases fall risk. A 36 inch landing gives one full step of recovery space, and 60 inches is needed where a door swings over it.
Minimum landing depth is typically 36 inches in residential code, and 60 inches where a door swings over the landing.
Stair geometry, slip resistance, and codes
Stair geometry is governed by building code. Typical residential limits include a maximum riser height of 7.75 inches, a minimum tread depth of 10 inches, and a maximum variation of 3/8 inch between the tallest and shortest riser in a flight. The nosing projection is typically limited to 1.25 inches and must be consistent.
Slip resistance matters more on stairs than on flat floors. A nosing with a textured or grooved top surface reduces slip risk. Wet or polished surfaces on stairs are a serious hazard, especially at exterior or basement stairs.
ADA standards apply to public and commercial stairs and require consistent riser heights, tread depths, and nosing projections. Private residential stairs are governed by the local building code, but following ADA-level consistency is good practice. ANSI A137.1 and IRC R311.7 set the stair geometry limits cited above. Always verify with the local authority having jurisdiction before finalising the design.
| Element | Typical limit | Notes |
|---|---|---|
| Riser height | 7.75 in max | Variation within a flight: 3/8 in max |
| Tread depth | 10 in min | Measured to nosing projection |
| Nosing projection | 1.25 in max | Must be consistent within a flight |
| Landing depth | 36 in min | 60 in where a door swings over it |
Fastening and installation considerations
Stair nosings take direct impact, so fastening must be robust. Hardwood noses are glued and face-nailed. Aluminum and PVC noses are screwed through pre-drilled holes. Pre-drill all screw holes to prevent splitting the nosing or the tread. Adhesive alone is usually insufficient for a stair nose because the peel force from a foot is high.
Fasteners must be countersunk and filled so they do not catch a shoe or a bare foot. Use colour-matched filler and sand flush after curing for a seamless finish. Sand with 120 grit then 180 grit for a smooth result. On open-tread stairs, the nosing fastening is visible and must be neat.
On closed stairs, fasteners can be hidden but must still be secure. Countersink depth should be 2 to 3 mm so filler sits flush and does not catch a shoe.
Allow adhesive to cure fully before traffic. Most construction adhesives need 24 hours for full strength. In cold or humid conditions, extend the cure to 48 hours and keep the stair out of use. Test the bond by pressing the nosing firmly after 24 hours; any movement means the bond failed and must be redone.
Walking on a freshly installed nosing can break the bond and create a loose edge.
Material and finish coordination
The nosing finish must match or deliberately contrast the flooring. A mismatched nosing draws the eye to every step and makes the stair look patched. Order the nosing from the same manufacturer as the flooring when possible, because dye lots and sheen levels vary between brands.
For hardwood stairs, the nosing can be site-finished to match the treads exactly. For LVP and laminate, the nosing comes pre-finished and must be selected from the manufacturer’s matching trim line. Substituting a generic colour rarely matches under natural light. Order 10 percent extra nosing to cover cuts and future repairs.
Textured and matte nosing finishes reduce glare and improve slip resistance. Glossy nosing on a stair is a safety and aesthetic mistake in most residential interiors.
When to call a professional
- Using a reducer as a nosing. A reducer bridges a height difference on a flat floor. It is not rated for tread impact and creates a trip edge.
- Mismatched nosing on the same staircase. Mixing flush and overlap noses creates uneven step heights and a visual break.
- Ignoring riser height limits. A flooring change that adds 6 mm to the tread thickness can push the riser height out of code if the top and bottom steps are not adjusted.
- Smooth nosing on a wet stair. A polished surface on an exterior or basement stair is a fall hazard.
- Inadequate fastening. Adhesive alone fails under repeated foot impact. Mechanical fastening is required.
- Forgetting the landing. The landing must be level, slip-resistant, and large enough to serve as a rest point.
When to call a professional
Stair installation involves fall risk and code compliance. Consider a professional when the staircase is open-tread, curved, or has non-standard geometry, when the flooring must be matched to an existing nosing, or when the local code requires inspection. A professional can verify riser consistency and nosing projection before the flooring is fixed.
Inspection and maintenance
Inspect stair nosings every 6 months for looseness, wear, and finish damage. A loose nosing is a trip hazard and should be re-fastened immediately. Worn nosing on a high-traffic stair should be replaced before the substrate is damaged. Keep the stair clean and dry, because grit accelerates wear on both the nosing and the flooring.
Summary
A stair transition is a nosing problem, not a doorway problem. Match the nosing to the flooring thickness and installation method, keep riser heights within code, ensure slip resistance, and fasten mechanically. A reducer cannot substitute for a stair nosing. Inspect the nosing every season and re-tighten fasteners as needed.
Replace worn nosing promptly to prevent falls and trips on stairs today always now please. For general transition selection, see flooring transitions between rooms and levels and how to install flooring transition strips.