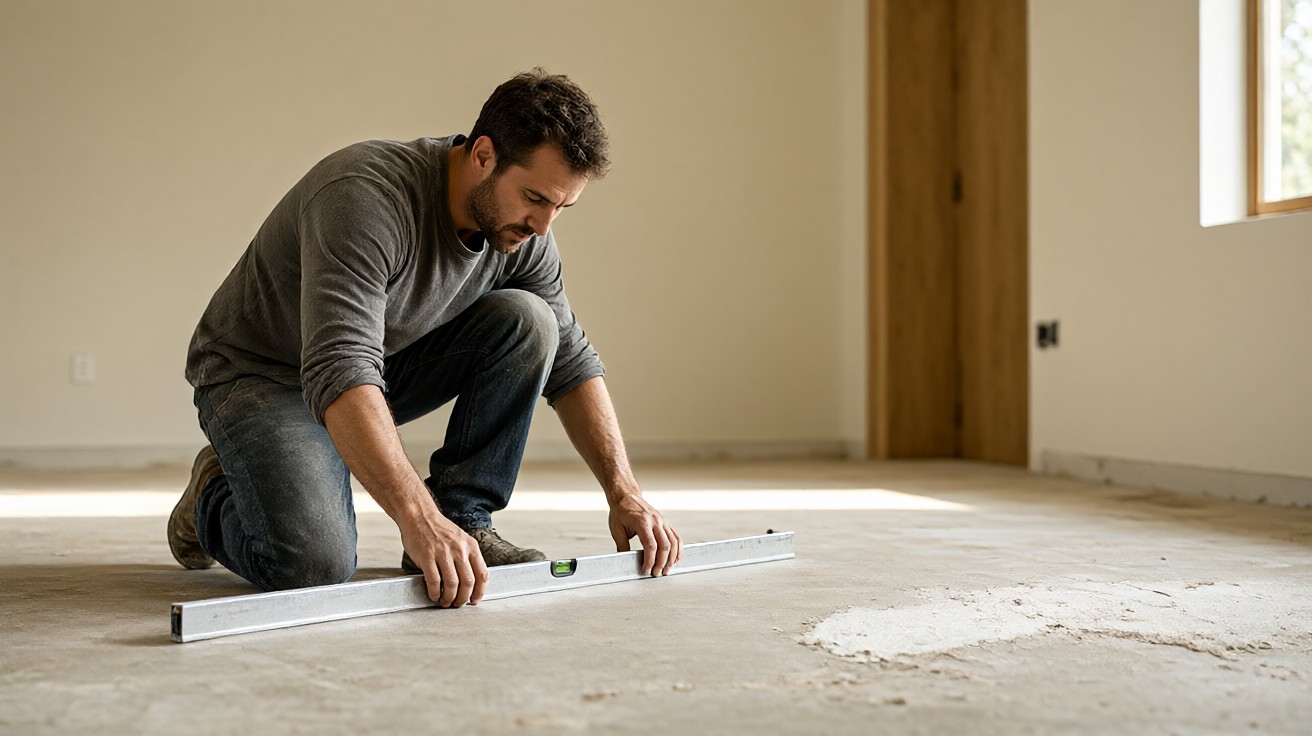

Subfloor preparation is the work done before installation, and it determines whether a new floor stays flat, dry, and quiet for its full service life.
Wood flooring tolerates one eighth inch in six feet, tile needs one quarter inch in ten feet, and every concrete slab must be moisture tested with ASTM F2170 or ASTM F1869 before installation.
If you are still choosing a floor, our guide to common flooring installation mistakes shows how skipped prep shows up months later as gaps, cupping, or loose tiles.
What Subfloor Preparation Actually Means
A subfloor is the structural layer that carries the finished floor. It is not the same as underlayment, which is a thin sheet or membrane installed over the subfloor to cushion, isolate sound, or manage moisture. Confusing the two leads people to patch a subfloor with underlayment, which cannot fix a structural problem.
Preparation has four jobs. First, make the surface flat within the tolerance the finished floor requires. Second, bring moisture to an acceptable level and keep it there. Third, confirm the material itself is sound, dry, and compatible. Fourth, remove contaminants such as old adhesive, paint, wax, and drywall compound that block bonding.
None of these steps is optional, and none can be rushed. Manufacturer warranties for flooring almost always make the installer responsible for verifying substrate condition before installation.
Why Flatness Matters
Flatness is not the same as level. A floor can be perfectly level and still not flat, and a floor can be flat enough for tile while sloping gently across a room. Flatness measures how much the surface deviates over a given distance, usually expressed as a fraction of an inch over six or ten feet.
What a Flatness Tolerance Means
A tolerance of one eighth of an inch in six feet means that if you lay a six foot straightedge anywhere on the subfloor, no gap between the straightedge and the surface should exceed one eighth of an inch. The same surface must also satisfy the ten foot tolerance, which is usually slightly looser. Both must pass.
NWFA Tolerances for Wood Flooring
The NWFA requires a wood subfloor to be flat to within three sixteenths of an inch in six feet, or one quarter of an inch in ten feet, for nail down installations using fasteners of one and a half inches or longer.
For glue down, floating, and shorter fastener installations, the tolerance tightens to one eighth of an inch in six feet, or three sixteenths of an inch in ten feet. Wide plank and glue down products often specify the tighter number regardless of fastener length.
ANSI and TCNA Tolerances for Tile
For ceramic tile, ANSI A108.02 sets the substrate flatness limit at one quarter of an inch in ten feet, with no more than one sixteenth of an inch in twelve inches, for tiles with all edges under fifteen inches.
For large format tile, where any edge exceeds fifteen inches, and for natural stone, the limit tightens to one eighth of an inch in ten feet and one sixteenth of an inch in twenty four inches. These tighter numbers are the reason large format tile installations so often require self leveling underlayment.
| Finished Floor Type | Flatness Tolerance | Source |
|---|---|---|
| Wood, nail down (fasteners 1.5 in or longer) | 3/16 in in 6 ft, or 1/4 in in 10 ft | NWFA Installation Guidelines |
| Wood, glue down, floating, or short fasteners | 1/8 in in 6 ft, or 3/16 in in 10 ft | NWFA Installation Guidelines |
| Ceramic tile, edges under 15 in | 1/4 in in 10 ft and 1/16 in in 12 in | ANSI A108.02 |
| Large format tile or natural stone | 1/8 in in 10 ft and 1/16 in in 24 in | ANSI A108.02 and TCNA Handbook |
| Concrete for wood flooring | 1/8 in in 6 ft, or 3/16 in in 10 ft | NWFA, Concrete Subfloors |
High spots are ground down and low spots are filled. Grinding concrete produces silica dust, so respirators and dust containment are not optional. Patching compounds shrink as they cure, so a single pass rarely reaches tolerance; two passes with a straightedge check between them is normal practice.
How flat does a subfloor need to be?
It depends on the finished floor. Wood flooring generally requires one eighth of an inch in six feet for glue down and floating installations, and three sixteenths of an inch in six feet for nail down.
Ceramic tile requires one quarter of an inch in ten feet, and large format tile requires one eighth of an inch in ten feet. Always follow the flooring manufacturer specification when it is stricter than the industry standard.
Moisture and Subfloor Performance
Moisture is the leading cause of flooring failure after poor flatness. Wood swells and cups, adhesive releases, tile grout cracks, and vinyl planks telegraph every bump. The problem is rarely visible water. It is vapor moving through the slab or subfloor over months.
Why Moisture Causes Flooring Failures
Concrete holds water from the original mix for weeks or months, especially in thick slabs and basement floors. Wood subfloors absorb humidity from crawl spaces and basements. When a finished floor seals the surface, that moisture has nowhere to go, so it pushes upward as vapor pressure.
The result is adhesive failure, cupping, buckling, and in the case of wood, mold growth in the cavity below.
How to Test Concrete Moisture
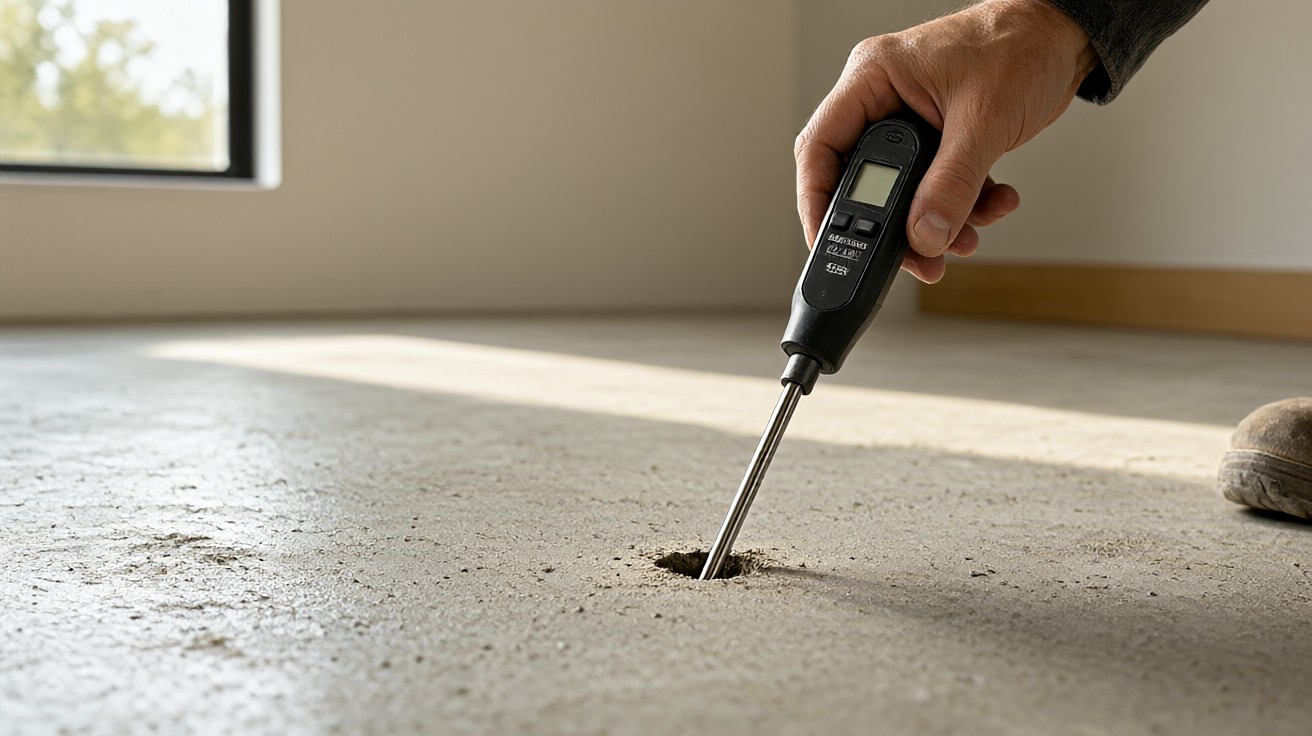
Two quantitative tests are standard. ASTM F2170 places in situ relative humidity probes in holes drilled to forty percent of the slab depth, and most flooring manufacturers accept a reading of seventy five percent relative humidity or lower.
ASTM F1869, the calcium chloride test, measures moisture vapor emission rate at the surface and most manufacturers accept five pounds per one thousand square feet per twenty four hours or less.
Both tests require the slab to be at service temperature and humidity for at least forty eight hours beforehand, and both require multiple test locations, typically three for the first one thousand square feet and one more for each additional one thousand square feet.
ASTM F2170 reads deeper into the slab and is preferred for thicker slabs and for moisture mitigation designs. ASTM F1869 is cheaper and faster but reflects surface conditions only. Many projects run both and document both, because the results are not interchangeable.
Wood Subfloor Moisture Limits
Wood subfloors are checked with a pin or pinless moisture meter. A common specification is twelve percent moisture content or less, with no more than four percent difference between the subfloor and the flooring product. If the subfloor reads wet, find the source, which is usually a plumbing leak, a missing vapor barrier in a crawl space, or poor exterior drainage, before installing anything.
| Test | What It Measures | Typical Acceptable Limit | Source |
|---|---|---|---|
| ASTM F2170 (in situ RH probe) | Relative humidity at 40 percent slab depth | 75 percent RH or lower | ASTM F2170 |
| ASTM F1869 (calcium chloride) | Moisture vapor emission rate at surface | 5 lbs per 1,000 sq ft per 24 hr or lower | ASTM F1869 |
| Pin or pinless wood meter | Moisture content of wood subfloor | 12 percent or lower, within 4 percent of flooring | Manufacturer installation instructions |
If a slab fails moisture testing, the fix is a moisture mitigation system, not a thicker underlayment. Epoxy and polyurethane membranes rated for high relative humidity are applied over a prepared slab and then covered with flooring. Our guide to identifying flooring moisture damage helps diagnose whether a failure is moisture related or something else.
Can I install flooring over a concrete slab without testing moisture?
No. Concrete holds water from the original mix for weeks or months, and a finished floor seals the surface so vapor has nowhere to go. Test with ASTM F2170 or ASTM F1869 before installation and document the results.
Subfloor Materials: Plywood, OSB, and Concrete
The three common subfloor materials behave differently, and preparation steps change with each one. Matching the preparation to the material is what separates a durable installation from a callback.
Plywood Subfloors
Plywood is the traditional wood subfloor. It is dimensionally stable, holds fasteners well, and tolerates minor moisture better than OSB. Preparation focuses on fastener pull, squeaks, and flatness. Loose panels are re secured with screws, not nails, into the joists. Seams that are out of plane are sanded or filled.
Plywood that has been wet and dried may have delaminated layers, which must be replaced rather than patched.
OSB Subfloors
Oriented strand board is common in newer construction because it is cheaper and stiffer in large spans. Its weakness is moisture. OSB swells at the edges when wet and does not fully recover, leaving ridges at panel joints that telegraph through finished flooring.
Preparation includes checking for swollen edges, sanding them flush, and verifying that the panel is not delaminating. OSB is generally acceptable for nail down and floating floors but is less ideal for glue down, because adhesive bonds less reliably to its surface.
Concrete Slabs
Concrete is the most demanding subfloor. It must be at least three thousand psi, free of cracks, loose areas, and hollow spots, and free of sealers, waxes, oils, paints, and drywall compound. Contaminants are removed by mechanical grinding, not by chemical strippers, which can leave residues that interfere with adhesion.
Cracks are evaluated for movement: dormant cracks can be filled, while active cracks need an uncoupling membrane or a crack isolation system.
For a deeper look at each material, see our guides on plywood subfloors, OSB subfloors, and concrete slab subfloors as they are published.
Is OSB as good as plywood for a subfloor?
OSB is stiffer and cheaper in large spans but is more vulnerable to edge swelling from moisture and bonds less reliably for glue down installations. Plywood is more dimensionally stable and holds fasteners better. Both are acceptable when dry and properly fastened.
Inspecting a Subfloor Before Installation
Inspection is a walk through with a straightedge, a moisture meter, and a hammer. Tap the surface listening for hollow sounds that indicate delamination or a void. Check every seam and fastener. Look for staining, which signals past water, and for efflorescence, the white powder that indicates moisture moving through concrete.
Document everything with photos and moisture readings before work begins, because that documentation is what protects you if a failure is later blamed on installation.
Our guide to identifying subfloor damage walks through the full inspection sequence step by step.
Leveling and Patching a Subfloor
Two products do the work. Patching and leveling compounds are troweled on for small areas and feathered edges, and they cure in hours. Self leveling underlayments are poured and flow to a flat plane, and they are the right choice for large areas or for tight tolerances such as large format tile.
Both require a primer on porous substrates and both are sensitive to temperature and humidity during cure.
Neither product is structural. A compound cannot fix a subfloor that flexes between joists, and pouring self leveler over a moving floor only delays the failure. Flex must be addressed by adding blocking or sistering joists before any surface work.
Vapor Barriers and Underlayment
A vapor barrier is a membrane with a perm rating of point one three or less, such as six mil polyethylene film, placed between concrete and a wood floor. It slows vapor transmission but does not stop a wet slab.
Underlayment is a separate product chosen for the finished floor: foam or cork for laminate and vinyl, cement board or uncoupling membrane for tile. The two are often combined, but neither replaces moisture mitigation on a slab that fails testing.
Our guide to underlayment for vinyl flooring covers which combinations manufacturers approve.
Do I need a vapor barrier over concrete?
For wood flooring over concrete, a vapor retarding membrane with a perm rating of point one three or less, such as six mil polyethylene film, is strongly recommended. A vapor barrier does not replace moisture mitigation on a slab that fails testing.
Installing Over Existing Surfaces
Installing over an existing floor is sometimes allowed and sometimes not. Ceramic tile can be a substrate for new flooring if it is well bonded, flat, and clean, but grout lines must be filled and the height change must be accounted for at doors and transitions.
Old adhesive residue must be removed or encapsulated per the new flooring manufacturer. Carpet and pad must always come out. When in doubt, remove to the structural subfloor, because every layer you leave adds height, stiffness problems, and a hidden failure point.
Cost of Subfloor Preparation
Costs vary widely by region and condition, but published ranges give a useful planning figure. Angi estimates subfloor replacement at roughly three to ten dollars per square foot, depending on materials and labor. Leveling a concrete subfloor typically runs three to seven dollars per square foot.
Moisture mitigation membranes add more, often two to five dollars per square foot installed. These figures are planning ranges, not quotes, and a site visit is the only way to get a real number.
How much does subfloor preparation cost?
Published planning ranges put subfloor replacement at three to ten dollars per square foot and concrete leveling at three to seven dollars per square foot. Moisture mitigation adds two to five dollars per square foot. Get a site specific quote before budgeting.
Common Subfloor Preparation Mistakes
The mistakes that recur are skipping moisture testing, assuming a new slab is dry, patching over contaminated concrete, ignoring swollen OSB edges, and installing over a floor that flexes. Each one is cheaper to catch during preparation than to fix after the finished floor is down. A floor that fails is not a flooring problem. It is a subfloor problem that was never addressed.