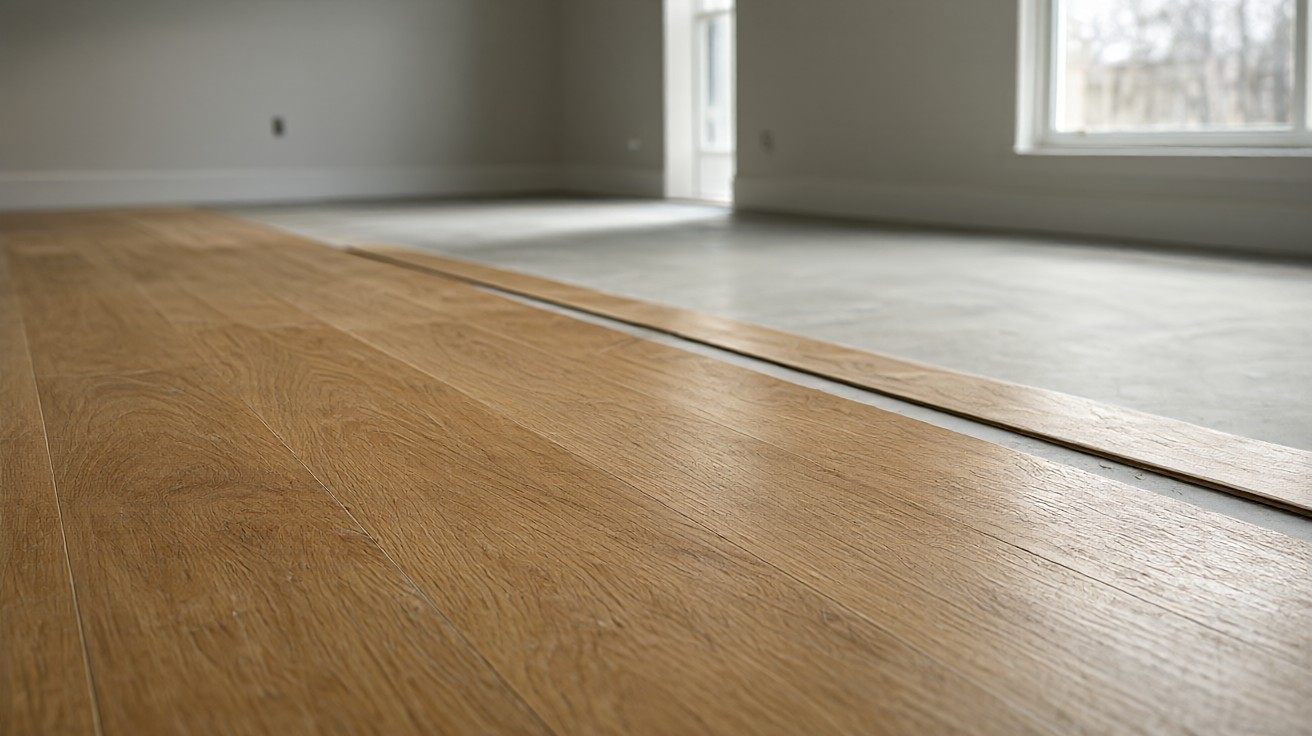

Engineered hardwood installs differently from solid wood, because the plywood core and the wear layer decide which method you can use on your floor.
The answer is the thickness of the product, and it decides everything else. Engineered wood runs from 3/8 inch to 3/4 inch, and what you can do with the thin products is narrower than what you can do with the thick ones.
Under that decision sit the moisture rules, the subfloor, and the expansion gap. Get those right and the rest of the install is ordinary work.
Why Engineered Wood Installs Differently From Solid Wood
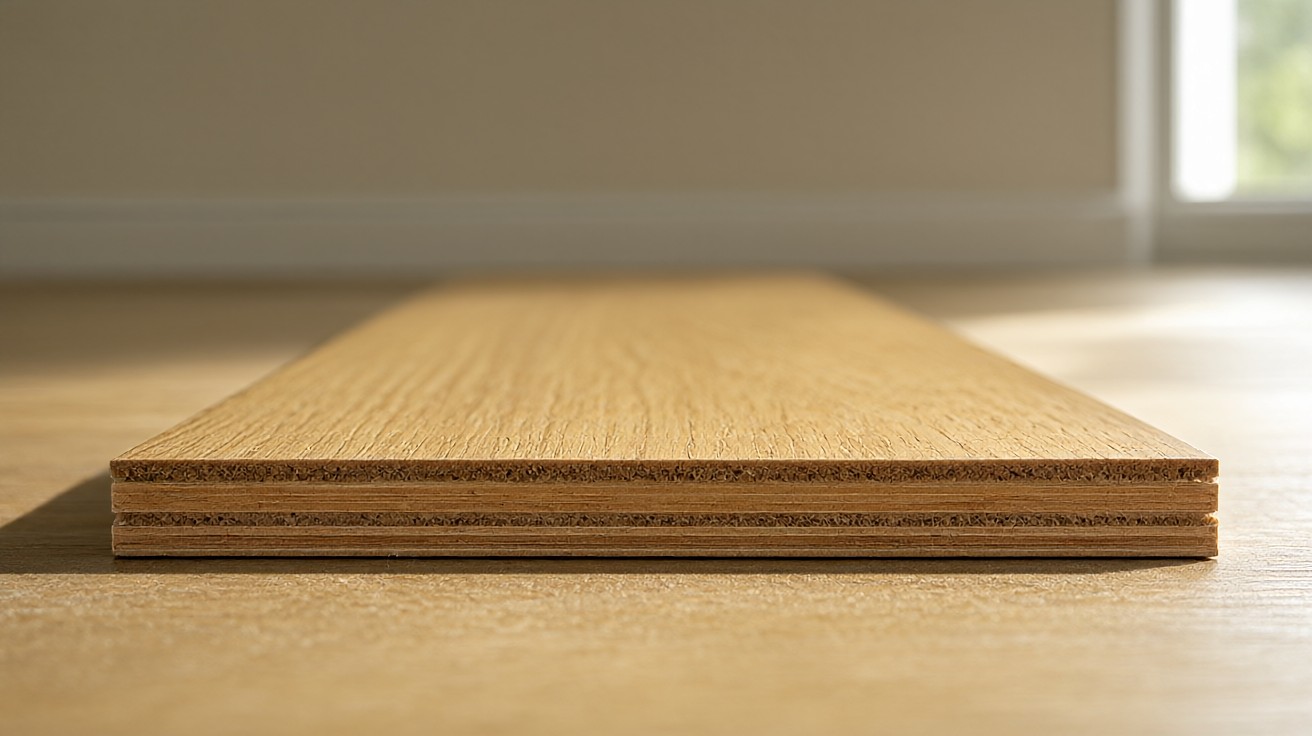
Solid hardwood is one piece of timber from top to bottom. Engineered hardwood is a thin wear layer glued to a core of cross-laminated plies, and that core changes how the floor behaves and how it has to be installed.
The Core Is What Changes The Install
Because the plies run in alternating directions, an engineered board barely moves across its width as the air around it changes. That stability is why engineered wood is the version of hardwood that goes over concrete and into below grade rooms, where solid wood is not allowed at all.
NWFA advises against installing solid wood below grade. Engineered wood is more dimensionally stable and is commonly installed on and below grade, subject to the warranty the manufacturer issues with the product. It still moves a little, which is why an engineered floor still needs a perimeter gap and still needs acclimation.
Can You Sand An Engineered Floor?
Usually not, and the wear layer decides. The NWFA Sand and Finish Guidelines say a floor with a wear layer below 3/32 inch should not be sanded, because sanding takes that layer off and leaves the glue line exposed.
A solid wood floor 3/8 inch or thicker has a surface that can be sanded. An engineered floor with a thin wear layer generally cannot be refinished at all, which changes what you can promise the owner of the house.
If the wear layer is under 3/32 inch, treat the floor as a product that gets replaced rather than one that gets restored, and say so before the install.
Checking The Product Before You Start
Find The Thickness, Wear Layer, And Approved Method
Three numbers on the box settle most of the install: the overall thickness, the wear layer thickness, and the plank width. The wear layer figure tells you whether the floor can ever be sanded, and the width tells you whether it can be floated at all.
Then find the approved method in the manufacturer’s own instructions. If those instructions allow glue-down, stapling, nailing, or floating for that product, you are not free to pick a different one because it is easier on the day.
Choosing Floating, Glue-Down, Or Fastened For Your Product
Every method has something under the floor: a substrate it is bonded to, a fastener driven through it, or nothing but its own weight and the strength of its neighbours.
| Method | What Holds The Floor Down | Where It Fits | The Limit That Decides It |
|---|---|---|---|
| Floating | Its own edge lock and adhesive in the joints | The manufacturer allows it and the board is wide enough | Boards at least 4 inches wide, and 3/8 inch product is not recommended |
| Glue-down | Urethane base adhesive with its matching vapor retarder | A product approved for bonding over a clean, dry, flat slab | The working time printed on the adhesive container |
| Staple-down | An 18 gauge staple, 1/4 inch crown, 1-1/2 inch long | Product from 3/8 inch to 1/2 inch thick | Thickness above 1/2 inch moves to a cleat |
| Nail-down | An 18 gauge cleat, 1-1/2 inch to 1-3/4 inch long | Product from 9/16 inch to 5/8 inch thick | Ask the manufacturer for anything thicker |
| Nail and glue | Fasteners plus a wood flooring adhesive | Planks over 5 inches wide, required over 7.5 inches | Adhesive and fastener both have to suit the board |
Floating Needs A Wide, Stable Board
Floating an engineered floor means the boards are held by their edges and by adhesive in the joints, not by anything driven into the subfloor. That only works when the board is heavy enough to stay down and wide enough to resist movement.
One installation guide requires engineered boards to be at least 4 inches wide before they can be installed as a floating floor system. A second manufacturer does not recommend floating 3/8 inch products at all, because the product is inherently light and a light board lifts at the edges.
Glue-Down Is The Bonded Option
Glue-down bonds the planks to the subfloor with a urethane base adhesive and the vapor retarder that goes with it. It suits a product the manufacturer has tested for bonding, over a slab that is clean, dry, and flat.
The adhesive procedure itself, from the trowel notch to the flash time to the rolling, is covered in how a glue-down install is done. For engineered wood, the part that changes is the product, because not every engineered plank is approved to be glued.
Staples Or Cleats, Decided By Thickness
Fastened installs split by product thickness. For 3/8 inch to 1/2 inch thick engineered flooring, one manufacturer specifies an 18 gauge staple with a 1/4 inch crown, 1-1/2 inch long. For 9/16 inch to 5/8 inch thick product, that manufacturer specifies 18 gauge cleats, 1-1/2 inch to 1-3/4 inch long.
If your product is thicker than 5/8 inch, ask the manufacturer for the fastener schedule rather than carrying one over from a thinner board. The fastener has to be long enough to hold and short enough not to come out the other side.
The nailing itself, the angle the fastener goes in at and the tool that drives it, is covered in how nail-down hardwood installation works.
Nail And Glue When Width Forces Both
Width is the other trigger. One installation guide requires nail and glue for engineered planks over 7.5 inches wide, and recommends it for every plank over 5 inches wide.
A wide plank has more surface area to hold down and more tendency to cup at the edges, so adhesive under the plank works with the fasteners instead of leaving the middle of the board free to move.
Moisture Content And Acclimation For Engineered Flooring
The 6 To 9 Percent Target
Wood floors are hygroscopic, and engineered wood is hygroscopic even though the plies are glued up. As the moisture content of a board changes, the board changes size, so it has to acclimate in the room it will live in rather than in a warehouse with a different humidity.
The NWFA Installation Guidelines put interior flooring moisture content at 6 to 9 percent, which is close to the average equilibrium moisture content for most US locations.
The 2 Percent Differential For Engineered Wood
The number that matters is the gap between the flooring and the subfloor below it. NWFA guidance says a solid wood floor can go down when the flooring moisture content is within 4 percent of the moisture content of the wood subfloor.
The difference should be 2 percent or less for wide width solid wood more than 3 inches wide, and for engineered wood flooring.
Engineered wood gets the tighter tolerance because the core is already built to move less. If your flooring reads more than 2 percent off the subfloor, acclimate it longer rather than laying it anyway.
Acclimatization is about conditions as much as time. The NWFA goal is a room at 30-50 percent relative humidity and 60 to 80 degrees F, with the flooring, the subfloor, and the room all in that comfort zone together.
What The Subfloor Has To Be
How Flat Does The Subfloor Have To Be?
Flat is the requirement that decides whether the floor feels solid underfoot, and for engineered wood the tolerance is specific. One installation guide requires the subfloor flat within 3/16 inch over any 10 foot radius and 1/8 inch over any 6 foot radius, checked with a straight edge, a laser line, or a string line.
High areas get ground down and low areas get filled with cementitious leveling compound before a single plank is opened. The method for making those measurements is on how to check subfloor flatness.
ASTM E1155 is the standard that expresses flatness as FF and FL numbers over a 10 foot span, and the usual limit for wood flooring is a 1/8 inch deviation over that span. Wide planks show a hollow spot sooner than narrow ones, so on a wide board floor the flatness figure is the number to argue about.
What A Concrete Slab Adds
Over a slab, the flatness requirement does not change, and the moisture question does. The slab is tested for moisture before anything is ordered, and the limit that applies is the one the flooring and adhesive manufacturers set for the product, not the one you remember from a tile job.
The starting condition is the same three words every time: clean, dry, and free of contamination.
What The Deck Has To Be Made Of
Flatness is only half of it. A fastened engineered floor needs a structural deck to hold the fasteners, and the deck thickness is set by how far apart the joists are spaced. One manufacturer specifies 7/8 inch plywood on 24 inch joist spacing, 3/4 inch plywood on 16 inch joist spacing, and 23/32 inch OSB on 19.2 inch joist spacing.
Particle board and MDF are not acceptable subfloors, and if the deck you have is one of those, it comes out before the felt goes down. If the floor goes over radiant heat, get the manufacturer’s written approval and ask for the subfloor temperature limit that goes with it.
Vapor Retarder And Underlayment For Engineered Wood
15 Pound Felt Over A Wood Subfloor
Under a fastened engineered floor over wood, the instructions call for 15 lb roofing felt, or #15 hardwood floor underlayment felt, or a flooring underlayment paper, installed over the subfloor before the floor is fastened.
Felt first, then the floor.
Felt laid over a finished floor is a repair, not an install.
6 Mil Polyfilm Over A Concrete Slab
Over concrete the retarder is a sheet. For a floating engineered floor with a separate pad, the sequence is 6 mil polyfilm first, taped at all seams with waterproof tape, and then the pad rolled out over the top of it.
A glued floor uses the vapor retarder that the adhesive manufacturer pairs with that adhesive, and it is part of the same system rather than an optional extra. If the room is below grade or unheated, the retarder is not optional, so ask the flooring manufacturer what they require.
Layout, Expansion Gap, And The Starter Row
The Perimeter Gap
Every wall gets a gap, because the floor moves and the wall does not. One installation guide specifies a 5/16 inch minimum expansion space for 5/16 inch flooring, the common figure for standard engineered plank is 1/2 inch at the perimeter, and one floating engineered instruction specifies 3/8 inch of expansion space.
Use the gap the manufacturer specifies for your product thickness rather than a number carried over from another job. The gap is filled after the floor is in and the trim goes back over it.
The Starter Row
The first row is the one that has to stay put. Fastened installs face-nail the first row with fasteners about 3/4 inch from the wall side, the groove side, of the board, every 4 to 6 inches, then work the field out from there.
Measure the wall before you trust the room to be square.
Toward the end of the room, the last 2 to 3 rows may need face-nailing as well, because the angle of the nailer will not reach under a wall that is in the way.
Staggering The End Joints
End joints are staggered so no two joints line up, and the engineered instructions call for at least 8 inches between the end joint of one plank and the end joint of the plank in the row below.
The pattern to avoid is the H, where four joints meet in a small square. That square of boards moves as one unit, and then it opens up in the middle of a floor that was supposed to be flat.
| Layout Item | The Figure | What It Protects |
|---|---|---|
| Perimeter gap, standard engineered plank | 1/2 inch | Seasonal movement at every wall |
| Perimeter gap, floating engineered | 3/8 inch | Movement of the floor as one piece |
| End joint stagger | At least 8 inches | Joints lining up across the field |
| Fastener spacing | Every 4 to 6 inches | Holding a wide plank down |
| Fastener distance from end joints | 2 to 3 inches | A joint that works loose under traffic |
| First row fastener position | 3/4 inch from the groove side | A starter row that stays against the wall |
Floating An Engineered Floor, Step By Step
The general method for a floating floor is set out in how a floating floor installation works. What changes for engineered wood is the product limits, the adhesive, and the gap.
1. Lay The Polyfilm And Pad
If you are using a separate pad, lay 6 mil polyfilm first and tape every seam with waterproof tape, then roll the pad out over it. Check the floor for flatness before the pad goes down, because the pad follows whatever is under it and hides nothing.
2. Run The 1/8 Inch Glue Bead
The boards are held to each other with a tongue and groove adhesive applied in a continuous 1/8 inch bead. It goes on the bottom side of the groove, along the long groove, and along each end joint.
A broken bead is a failed joint.
That bead is the only thing holding the edge of the floor together, so it has to be continuous. A break in it becomes a joint that opens the first time somebody walks on it.
3. Work The Field
Lay the field as one piece, keeping end joints at least 8 inches apart from the row below. Do not work on top of the installed flooring. Walk on boards you lay over the field as you go, or you will put a ridge in a floor that has to stay flat.
The two product limits already covered stop the job before it starts: boards under 4 inches wide are not a floating floor system, and a 3/8 inch product is not one to float.
Glue-Down And Fastened Install Variations
What Changes In Each Method
Glued engineered floors need a urethane base adhesive with its matching vapor retarder, a product the manufacturer has approved for bonding, and a slab that is clean, dry, and flat. The timing rules that decide whether the adhesive bonds belong to the adhesive, not to the wood, so read the container before you open the first carton.
Wide engineered planks change fastened installs the most. A wide board cups at the edges more readily than a narrow one, so adhesive under the plank works with the fasteners instead of leaving the middle of the board free to move.
When The Floor Can Carry Foot Traffic
How Long Before You Can Walk On It?
Do not allow foot traffic on the floor for 24 hours after installation is complete. That figure comes from the engineered installation instructions for the fastened and floating methods, and it is the first number to put in the contract with the homeowner.
Twenty four hours, no exceptions.
If the floor was glued, the cure time printed on the adhesive governs and it is normally longer, so read the container and treat it as the longer number. Leave the floor clear of rugs and furniture for the same period, because anything heavy left in place too soon leaves an impression in a floor that has not finished taking its shape in the room.
Where Engineered Installs Fail
Most engineered failures trace to a rule that was known and skipped. Floating a 3/8 inch product, or floating boards under 4 inches wide, produces a floor that moves and lifts. Laying boards whose moisture content sits too far off the subfloor produces cupping and open joints in the first dry winter.
Leaving the perimeter gap short produces a floor that buckles into the wall line. Nailing a subfloor that is not flat produces squeaks and hollow spots that no amount of finish will fix, and gluing over an untested slab produces a bond that fails from below.
Then there is the sanding question. A floor with a wear layer under 3/32 inch cannot be refinished, so sanding it does not restore the floor, it ends it.
A Short Checklist Before The First Plank Goes Down
Run this list before the first carton is opened, while it is still cheap to stop the job.
- The method you are using is the one the manufacturer’s instructions allow for that product.
- Product thickness, wear layer thickness, and plank width are written down, and the wear layer figure tells you whether anyone can sand this floor later.
- Flooring moisture content is within 2 percent of the subfloor moisture content.
- The room is between 30-50 percent relative humidity and 60 to 80 degrees F, and the flooring has been sitting in that room long enough to reach those numbers.
- Subfloor flatness checked against 3/16 inch over any 10 foot radius and 1/8 inch over any 6 foot radius.
- A concrete slab tested for moisture, and the result inside the limits the flooring and adhesive manufacturers set.
- Felt or polyfilm retarder down before the floor goes down, seams taped.
- Perimeter gap marked before the first row, 1/2 inch for standard engineered plank or the figure the manufacturer gives for your thickness.
- End joints staggered at least 8 inches, with no H patterns.
- Fastener or adhesive matched to the thickness and the width of the board.
- 24 hours of no foot traffic scheduled before anybody walks on the new floor.