
You bought LVP for the basement, the slab is bare, and the first row goes down Monday. Flatness, moisture, and layout decide whether the floor performs.
Start with the product in your hands, because click-lock and glue-down LVP are different jobs with different tools and different rules about how the floor moves. The answer is the edge profile: a locking tongue and groove that floats over the slab, or a flat back that gets glued down.
What Kind Of LVP You Are Installing Decides The Method
Two installation methods exist for rigid core luxury vinyl plank, and the carton tells you which one you bought. A plank with a locking profile on its edge is click-lock. A plank with a flat back and no profile is glue-down, and the two do not share a toolbox.
Rigid core plank gets its name from the core, stone polymer composite or wood polymer composite. That core is what lets the plank lock edge to edge without adhesive, and what keeps the plank dimensionally stable across a slab that sweats in July.
Click-lock or glue-down: what actually changes?
The tools are the first difference. A click-lock install needs a set of spacers, a tapping block, a rubber mallet, and a pull bar. A glue-down install needs adhesive and the tools to spread it across the slab and work it into the surface.
The movement is the second difference, and it is the one that matters. A click-lock floor is a floating floor: the planks lock to each other and the whole field expands and contracts as one piece across the slab.
That is the same mechanic described in how a floating floor installation works, and it is why rigid core is never nailed or adhered to the substrate.
A glued floor is the opposite. The planks are bonded to the slab, so the slab and the floor move together, and the adhesive does the holding. If you chose glue-down LVP, the plank is set into a spread of adhesive and the floor is rolled; the guide to glue-down installation covers that sequence in detail.
| Point of difference | Click-lock rigid core LVP | Glue-down LVP |
|---|---|---|
| How the floor is held | Planks lock to each other, nothing attaches to the slab | Adhesive bonds the plank to the slab |
| Core tools | Spacers, tapping block, rubber mallet, pull bar | Adhesive, notched trowel, roller |
| How it moves | The whole field floats and moves as one piece | The field is bonded and moves with the slab |
| Perimeter gap | 1/4 inch, 1/2 inch where the room swings | 1/4 inch, 1/2 inch where the room swings |
| Traffic after install | As soon as the seams are seated | When the adhesive schedule says so |
| Taken up later | Yes, with less mess | No |
LVP or laminate: what changes for the installer?
Both are floating floors with a click joint, and that is where most comparisons stop. The install differences are real.
Laminate is a paper-faced board on a fiberboard core that wants a foam underlayment and a wider gap at the walls, and its core reacts to moisture.
Rigid core LVP is a rigid composite core that locks edge to edge with no underlayment, takes a 1/4 inch gap, and staggers end joints at least 6 inches apart.
If the choice is still open, how to install laminate flooring covers that install in full, and the differences above are what decide which one belongs in your room.
What Has To Be True Before The First Plank Goes Down
Rigid core LVP is more forgiving than almost any other floating floor, and it is still a floor that has to be installed inside a temperature and humidity window. The carton, the room, and the clock matter more than the plank color.
What temperature and humidity does the room need?
Keep the area that receives the floor between 65°F and 85°F for 48 hours before the install, during it, and for 48 hours after it is finished. Keep relative humidity between 40% and 60% while the floor goes down.
Those numbers are not suggestions. Install a cold plank in a warm room and the seams open as the plank warms and grows. Install a warm plank in a cold room and the joints tighten against each other.
After the floor is in service, the room should never go above 85°F or fall below 55°F. That is the range where the product stays dimensionally stable for the life of the floor.
How long do the cartons need to acclimate?
It depends on the manufacturer, and the two published positions are not close. One major brand requires the cartons to acclimate in the room of installation at 55°F to 85°F for at least 48 hours before the job, during the job, and for at least 24 hours after it finishes.
Another does not require acclimation for rigid core at all, but says that if you cannot hold the required temperature and humidity, a 48-hour acclimation period is required. Cartons go down flat, stacked evenly, no more than five high, away from heating or cooling ducts and out of direct sunlight.
What happens over radiant heat or in an unheated room?
Radiant heat needs the manufacturer’s approval for resilient vinyl before you install over it. The subfloor temperature should not exceed 85°F, and the system should be turned off 24 hours prior to and after the installation. One brand goes further and caps the floor surface temperature at 82°F while asking for 65°F to 85°F for 48 hours after the install.
Rigid core LVP is an indoor product, and it is not for unheated locations. A three-season porch, a cabin, or a vacation home that sits cold all winter is outside what the manufacturer warrants, and a floor that moves more than the gap allows will gap or cup.
| Job site condition | What the published instructions require | What goes wrong outside it |
|---|---|---|
| Room temperature during install | 65°F to 85°F, 48 hours before, during, and 48 hours after | Seams open as the plank warms, joints tighten as it cools |
| Relative humidity | 40% to 60% while the floor goes down | Edges lift, gaps open, planks cup |
| Room temperature in service | Never above 85°F, never below 55°F | Long term gapping at the perimeter |
| Carton storage | Flat, stacked evenly, no more than five high, out of direct sun | Uneven acclimation across the stack |
| Acclimation | 48 hours in the install room where conditions cannot be held | Planks laid at a temperature the room is not |
| Radiant heat | Manufacturer approved, subfloor under 85°F, system off 24 hours before and after | Floor driven past the movement range it was approved for |
Joining Planks And Securing The Click-Lock Seam
Everything about a click-lock floor comes down to one joint. Get the joint right and the floor is flat for the life of the house. Get it wrong and nothing else you did matters.
How does the click-lock seam go together?
Slide the groove under the tongue and along the length of the plank until it lines up with the plank before it. Then seat the short side vertically down into the previous plank and secure it with a rubber mallet.
Engage the long side flat first, then drop the end. Forcing a joint closed at an angle chips the locking profile, and a chipped profile will not lock later no matter how many times you hit it.
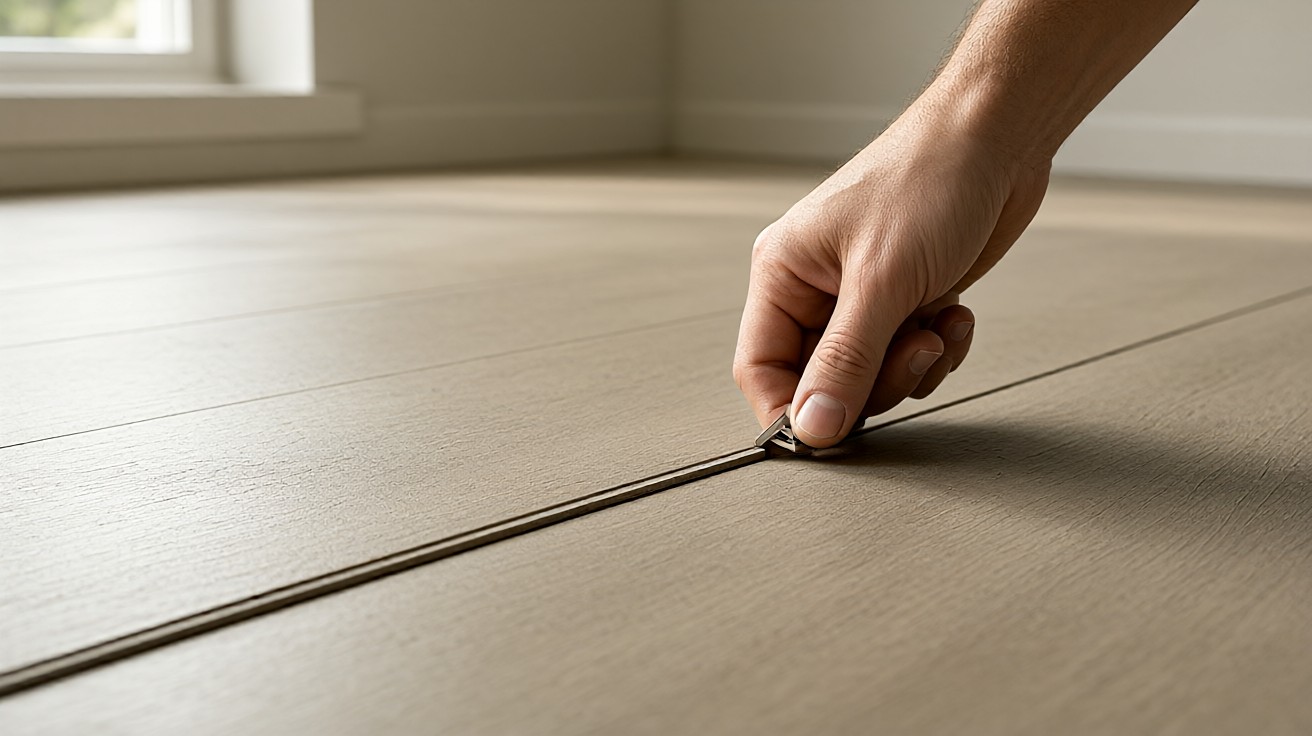
A seam that is fully seated shows a continuous line and no shadow under it when you look across it at a low angle. A joint with daylight beneath it is not locked, and the mallet comes out again.
Sawdust and a chipped bevel in the groove are the two most common reasons a click-lock seam refuses to close, and both are cheaper to prevent than to repair.
Clean the groove before you seat the plank, not after.
Preparing A Concrete Or Wood Subfloor For A Resilient Floor
The subfloor does not get a second chance. LVP is thin and rigid, so every dip and high spot in the slab shows up later as a rocking plank, a lifted joint, or a hollow sound underfoot.
What does ASTM F710 ask of a concrete slab?
ASTM F710 is the standard practice for preparing a concrete floor to receive resilient flooring. It asks for a slab that is clean, dry, free of contamination, and properly prepared, and it sends you to the moisture tests before anything is covered.
Free of contamination is the part people skip. Dust, paint, wax, sealer, and old adhesive all sit between the plank and the slab, and they are the reason a floor that looked good on installation day comes up later.
How flat does the subfloor have to be?
Flatness for a resilient floor is measured with ASTM E1155, which produces FF flatness and FL levelness numbers over a 10 foot span. The figures most commonly required for resilient flooring are FF 35 and FL 25.
For a wood subfloor, the usual wood flooring limit is 1/8 inch of deviation over a 10 foot span, and one engineered flooring guide calls for engineered subfloors flat within 3/16 inch over any 10 foot radius and 1/8 inch over any 6 foot radius.
Measuring that is a separate job, and how to check subfloor flatness covers the tools and the method. What matters here is the number you are aiming at before the first plank gets opened.
What has to come up before the first plank?
Residual asphalt adhesive from an old cutback installation cannot stay where it is. Never install LVP over residual asphalt adhesive, because the residue can bleed up through the new plank and stain it.
Over wood, the gap requirement changes too. A wood substrate affected by moisture or temperature swings, such as a crawlspace or a mobile home, wants a 1/2 inch gap instead of 1/4 inch.
Moisture Testing The Slab
Concrete holds water long after the pour, and that water comes up as vapor through the slab. A resilient floor sealed over a damp slab is a floor that delaminates, and the failure arrives as blisters and loose seams rather than as a clean complaint.
When does a slab have to be moisture tested?
ASTM F710 calls for moisture testing before a resilient floor goes down over concrete, and it points at two test methods: ASTM F1869, the calcium chloride test, and ASTM F2170, the in-situ relative humidity probe. If the slab is new, if it has been wet, or if the space is a basement, test it.
What do the two tests measure?
ASTM F1869 measures the moisture vapor emission rate over a 72 hour test with calcium chloride discs, and the limit most resilient flooring specifications call for is 3 pounds per 1,000 square feet per 24 hours.
ASTM F2170 drives a probe into the slab and reads the relative humidity in place, and the ceiling most resilient flooring specifications set is 75% RH. Above either limit, resilient flooring does not go down over that slab.
Dry the slab, find the water, test again. Nothing dries a slab that is still wet.
Underlayment, Vapor Retarder, And What LVP Can Sit On
Does rigid core LVP need an underlayment?
Many rigid core planks arrive with a foam or cork pad already attached to the back, and those go straight down on the prepared slab. Planks without an attached pad take a separate pad, and it has to be one the manufacturer lists for the product, because an unlisted pad changes the whole installation system.
A pad does not stop moisture. Over concrete, a 6 mil polyethylene sheet, or a pad with an integrated vapor barrier, is standard for resilient flooring over a slab, and the seams get lapped and taped.
What can LVP sit on, and what can it not sit on?
LVP can sit on a properly prepared concrete slab, on a sound wood subfloor, and over an existing floor only where the manufacturer allows it. It cannot sit on residual asphalt adhesive, and it cannot go into an unheated room.
Rigid core is a floating floor. It should not be adhered or nailed to the substrate, and treating it like a nailed floor is how a warranty gets voided.
Layout, Expansion Gap, And The Starter Row
How wide should the expansion gap be?
Leave a 1/4 inch gap, which is 6.3 mm, around all walls and vertical objects. That is the baseline for most rigid core installs and the number your spacers should be set to.
The gap doubles to 1/2 inch, 12.7 mm, over a wood substrate affected by moisture or temperature swings, in a room without permanent HVAC control such as a three-season room or a seasonal vacation home, and in any area larger than 2,500 square feet. Below 2,500 square feet, 1/4 inch is the figure.
Border pieces are where layout math goes wrong. Avoid a cut piece under 2 inches wide on a 4 inch wide plank, and under 3 inches on a 6 inch wide plank. If the border would come in under half the plank width, shift the center starting line by half the plank width rather than squeezing a sliver against the wall.
How far apart should the end joints land?
Stagger end joints at least 6 inches between rows for plank, and at least 3 inches for tile formats. The reason is not cosmetic. A straight line of joints running across a floor is a line that opens up and catches the light.
Start along the longest straight wall you can find, and leave the expansion gap on all four sides rather than only where boards get cut.
| Condition | Figure | Why it is the figure |
|---|---|---|
| Standard room under 2,500 sq ft | 1/4 inch gap (6.3 mm) | The baseline perimeter allowance for rigid core |
| Room over 2,500 sq ft | 1/2 inch gap (12.7 mm) | More floor moves more, and the perimeter takes it |
| Wood subfloor with moisture or temperature swings | 1/2 inch gap (12.7 mm) | Crawlspace and mobile home conditions move the deck |
| Room without permanent HVAC | 1/2 inch gap (12.7 mm) | Three-season rooms, cabins and seasonal homes swing hard |
| End joint stagger, plank | 6 inches minimum | Keeps joint lines from running straight across the room |
| End joint stagger, tile | 3 inches minimum | The same rule for a square format plank |
| Border piece on a 4 inch plank | 2 inches minimum | A narrower cut edge chips and looks wrong |
| Border piece on a 6 inch plank | 3 inches minimum | The same rule at a wider plank size |
Cutting The Last Row And Fitting Around Obstacles
How do you cut the last row when the room is not square?
Measure the last row at both ends of the room. If the two numbers differ, the wall is out of square and the row has to be scribed to the wall rather than cut to a single width.
Leave the same 1/4 inch gap at the last row as everywhere else, pull the row tight with a pull bar, and keep a scrap of flooring between the bar and the wall so the bar does not chew the baseboard.
How do you fit around pipes, cabinets, and vents?
A pipe gets a hole cut for it, not a notch guessed at. Measure from the wall to the center of the pipe, transfer the measurement, and cut. Leave the same perimeter gap around the pipe that you leave at the wall.
Cabinets that stay in place mean the floor stops at the cabinet and the gap at the wall does the moving. Cabinets that come out mean the floor runs under them and you still leave the gap around the wall.
For cuts, a fine-tooth blade or a utility knife on a scored line beats a coarse blade, which shaves the locking profile off the cut edge.
When The Floor Can Carry Foot Traffic
How soon can you walk on it?
A click-lock rigid core floor has no adhesive to cure, so it takes foot traffic as soon as the seams are seated and you are satisfied that the joints close. There is no clock to wait out.
The environmental clock still runs. Keep the room between 65°F and 85°F for 48 hours after the install is complete, and give the floor that same 48 hours to settle into its gap before furniture goes back down.
Glue-down LVP is on the adhesive’s schedule rather than the plank’s, and the cure time comes from the product you are installing. Until that time has passed, keep the room in range and keep the traffic off the floor.
A click-lock floor that gets walked on too early does not fail. It just keeps moving.
What Goes Wrong And How To Prevent It
Gapping along the walls
A gap that opens along the wall line months later usually means the gap was too small, not too large. The floor expanded and had nowhere to go. Fixing it means lifting the perimeter and re-cutting the row, not filling the gap with caulk.
The same symptom shows up if the room was at the top of its temperature swing when the floor went down.
Seams that will not lock, and floors that cup
A seam that will not close is a dirty groove, a damaged locking edge, or a plank that is not dropping straight down onto the one before it. Each has a different fix, and only one of them is a subfloor problem.
Cupping, where the floor bows up at the joints, points at moisture under the floor or at a slab that was never tested. The plank is rarely the culprit, and no amount of extra tacking fixes a wet slab.
| Symptom | What it usually means | What to do |
|---|---|---|
| Gap opens along one wall | Perimeter gap too small for the room | Lift the perimeter row and re-cut it |
| Joint will not lock | Dust or a chipped bevel in the groove | Clean the groove, replace a damaged plank |
| Plank rocks underfoot | Hollow spot in the subfloor | Fill or level the hollow area before laying |
| Staining that appears months later | Residual asphalt adhesive under the new floor | Remove the residue before installing |
| Floor bows up at the joints | Moisture under the floor, slab never tested | Dry the slab, retest, then reinstall |
None of this is difficult work. It is preparation work, and the parts that decide whether the floor is flat in five years happen in the two days before the first plank moves.